11
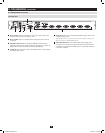
5. Installation
(
continued
)
5.9.1 Local Console
(
continued
)
5.9.2 IP Installer
5.9.3 Browser
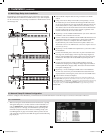
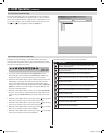
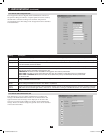
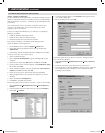
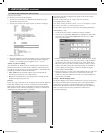
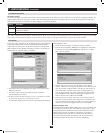
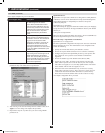
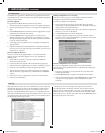
2. Press the [F4] keytobringuptheOSDAdminpage.
3. IntheOSDAdminpage,highlightSET IP ADDRESS and press the [Enter] key.
4. DHCP–ThersteldallowsyoutoenableordisableDHCP.Whenenabled,theKVMisassignedanIPaddressbytheDHCPserver.Thissettingis
enabled by default. To disable the DHCP setting and set up a fixed IP address, press the [Spacebar] key.OncetheDHCPisdisabled,youwillbeal-
lowedtoedittheremainingeldsintheSETIPADDRESSscreen.
5. Intheremainingelds,enterintheIPaddress,subnetmaskanddefaultgatewayyouwanttoassigntotheKVMswitch.
6. Pressthe[Esc] key to exit the SET IP ADDRESS screen, and to pull up a prompt asking if you wish to save the settings you just entered. If you do not
wish to save the settings, press the [N] key. If you do wish to save the settings, press the [Y] key. Upon pressing the [Y] key, the settings will be saved
andtheKVMwillbereset.
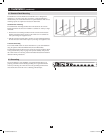
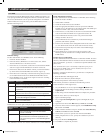
ComputersthatarerunningWindowscanusetheIP Installer utility found
intheincludedCDtoassignanIPaddresstotheKVM.
Note: The IP Installer Settings section located in the Network page of the
KVM’s web management interface must be enabled in order to use the IP
Installer to assign an IP address. (See page 43 for details.) This setting is
enabled by default.
1. Save the IP Installer.exelefromtheCDtoadesiredlocationona
computerthatisonthesamenetworkastheB020-U08-19-IP.
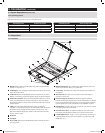
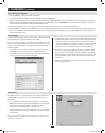
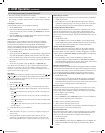
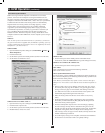
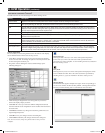
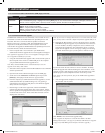
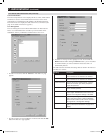
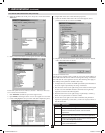
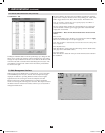
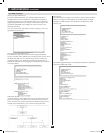
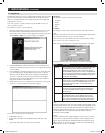
2. Locate the IP Installer.exelethatyoujustsavedanddouble-clickon
it. A screen similar to the one below will appear:
3. TheIPInstallersearchesthenetworkanddisplaysallB020-U08-19-IP
KVMSwitchesitndsinthedevicelist.Ifyourdevicedoesnotshow
up in the list, click the Enumerate button to refresh the device list. If
morethanoneB020-U08-19-IPshowsupinthelist,locatethedesired
deviceusingtheMacaddresslocatedonthebottomoftheconsole
KVM.Onceyouhavelocatedyourdeviceinthelist,highlightit.
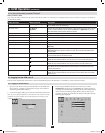
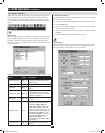
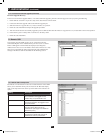
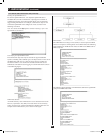
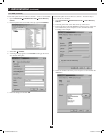
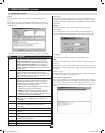
4. From here you can choose between the following two options: Obtain
an IP address automatically(DHCP)orSpecify an IP address. If you
choosetoassignyourownaddress,llintheIPAddress,SubnetMask,
and Gateway fields with information appropriate to your network. Click
on the Set IP button to apply the new network settings to the selected
KVMswitch.
5. After the new IP address shows up in the device list, click the Exit but-
ton to exit the IP Installer.
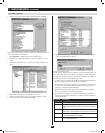
IftheKVMswitchisonanetworkthatdoesnotcontainaDHCPserver
to automatically assign an IP address, the default IP address is set to
192.168.0.60.
1. On a computer/server that is on the same network as your console
KVMswitch,setthecomputer/server’sIPaddressto192.168.0.XXX,
whereXXXrepresentsanynumberornumbersexcept60,as
192.168.0.60isthedefaultIPaddressoftheKVM.
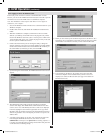
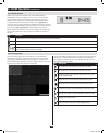
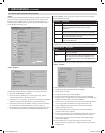
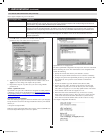
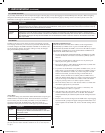
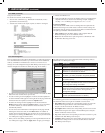
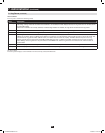
2. Usingthiscomputer/server,accesstheB020-U08-19-IPviatheURL
192.168.0.60.Ascreenwillappearaskingyoutoprovideausername
and password.
Note: If you are first prompted by a screen that says the websites security
certificate can not be trusted, click on the link to proceed anyways; the
certificate can be trusted.
201009236 93-2985.indd 11 11/18/2010 4:21:36 PM