45
7. Administration
(
continued
)
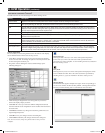
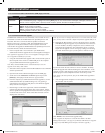
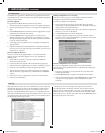
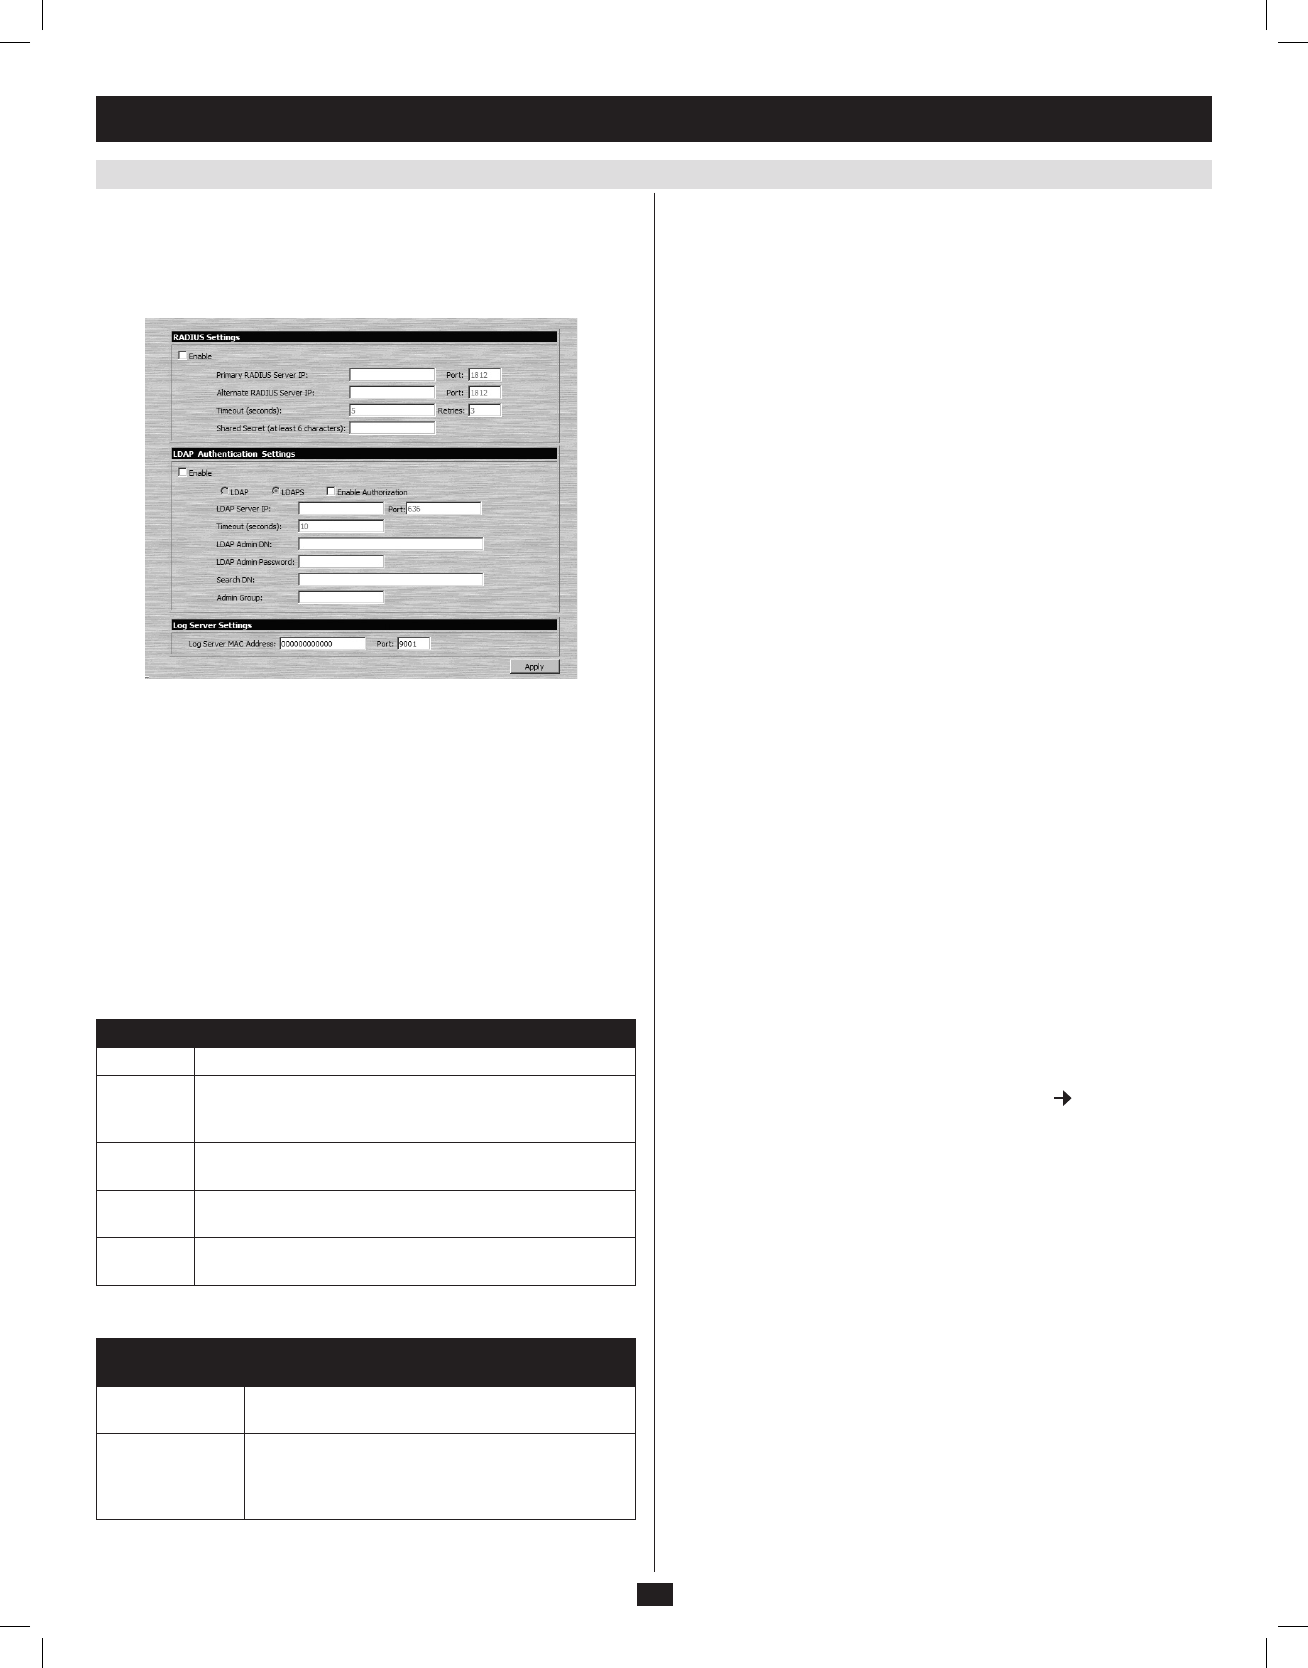
7.3.4 ANMS
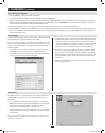
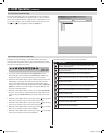
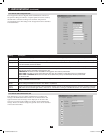
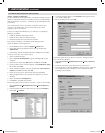
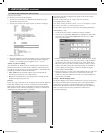
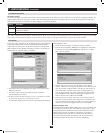
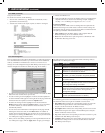
TheAdvancedNetworkManagementSettings(ANMS)pageallowsyou
to set up login authorization management from an external source. From
thisscreen,administratorscansetupremotemanagementviaRADIUS
and/orLDAP/S,andsetuptheaccessportandMACaddressforthe
Windows-basedlogserver.
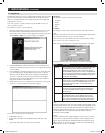
RADIUS Settings
ToallowauthorizationforaRADIUSserver,dothefollowing:
1. Check the Enable checkbox.
2. Fill in the Primary RADIUS Server IP and access Port, and the
Alternate RADIUS Server IP and access Port.
3. IntheTimeout (seconds)field,setthetimeinsecondsthattheKVM
waitsforareplyfromtheRADIUSserverbeforeittimesout.
4. In the Retriesfield,enterthenumberoftimesyouwanttheKVMto
tryandreconnectwiththeRADIUSserverbeforeitgivesup.
5. In the Shared Secret field, key in the character string that you want to
useforauthenticationbetweentheKVMandtheRADIUSServer.
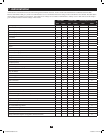
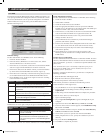
6. OntheRADIUSserver,settheaccessrightsforeachuseraccording
to the information in the table:
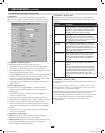
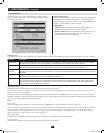
Character Description
C Gives the corresponding account administrator privileges.
W Gives the corresponding account access to the KVM
switch via the Windows browser and non-browser
applications.
J Gives the corresponding account access to the KVM
switch via the Java browser and non-browser applications.
L Gives the corresponding account access to the log server
on the Web Management Interface.
V Gives the corresponding account view-only access to all
ports on the KVM switch.
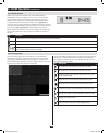
RADIUSServeraccessrightsexamplesaregiveninthefollowingtable:
RADIUS Access
Rights
Description
C The corresponding account has administrator
access to the KVM.
W, J, L User can access the system via the Windows and
Java browser and non-browser applications, and
can access the log server on the Web Management
Interface.
Note: Characters are not case sensitive. Characters are comma delimited.
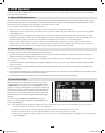
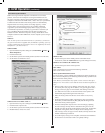
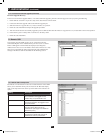
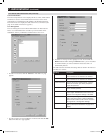
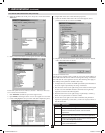
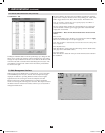
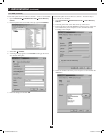
LDAP Authentication Settings
ToallowauthenticationandauthorizationviaLDAP/S,dothefollowing:
1. Check the Enable checkbox.
2. Select LDAP or LDAPS.
3. ChecktheEnable Authorization checkbox.
4. EntertheappropriateIPaddressandaccessportfortheLDAPor
LDAPSserverintheLDAP Server IP and Port fields. The default port
numberforLDAPis389,andis636forLDAPS.
5. In the Timeout (seconds)field,setthetimeinsecondsthattheKVM
waitsforanLDAPorLDAPSserverreplybeforeittimesout.
6. IntheLDAP Admin DNfield,setthe‘root’pointfortheLDAP
manager to bind to the server.
7. In the LDAP Admin Passwordfield,keyintheLDAPmanager’s
password. (This field is optional.)
8. IntheSearch DN field, set the distinguished name of the search base
(i.e. the domain name where the search starts for the user name).
9. IntheAdmin Groupfield,keyinthenameoftheLDAPmanager.
(This field is optional.)
10.OntheLDAPserver,settheaccessrightsforeachuser.(The
followingsectionsdescribehowtoconfigureLDAPforusewiththe
KVMswitch.)
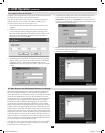
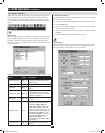
LDAP/S Server Configuration
ToallowauthenticationandauthorizationviaLDAPorLDAPS,theactive
directory’sLDAPSchemamustbeextendedsothatanextendedattribute
namefortheKVM–permission – is added as an optional attribute to the
person class.
Note: Authentication refers to the identity verification of the person
logging into the KVM switch, whereas Authorization refers to the
assigning of device permissions.
InordertoconfiguretheLDAPserver,youwillhavetocompletethe
following procedures:
• InstalltheWindows2003SupportTools
• InstalltheActiveDirectorySchemaSnap-In
• ExtendandUpdatetheActiveDirectorySchema
Each of these procedures is described in the following sections:
Install the Windows 2003 Support Tools
1. OnyourWindowsserverCD,opentheSupport Tools folder.
2. In the right panel of the dialog box that comes up, double click
SupTools.msi.
3. FollowalongwiththeInstallationWizardtocompletetheprocedure.
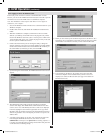
Install the Active Directory Schema Snap-In
1. Open a Command prompt.
2. Keyinregsvr32 schmmgmt.dll to register schmmgmt.dll on your
computer.
3. OpentheStart menu. Click Run and key in mmc /a. Click OK.
4. In the File menu of the screen that appears, click Add/Remove Snap-
in, and then click Add.
5. Under Available Standalone Snap-ins, double click Active Directory
Schema, click Close and then click OK.
6. Onthescreenyouarein,opentheFile menu and click Save.
7. Whenpromptedwheretosave,specifytheC:\Windows\system32
directory.
8. Keyinthefilename schmmgmt.msc.
9. ClickSave to complete the procedure.
201009236 93-2985.indd 45 11/18/2010 4:21:49 PM