ProSafe Dual WAN Gigabit Firewall with SSL & IPsec VPN FVS336G Reference Manual
3-4 LAN Configuration
v1.2, June 2008
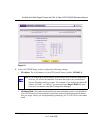
3. In the DHCP section, select Enable or Disable DHCP Server.
By default, the VPN firewall will function as a DHCP server, providing TCP/IP configuration
settings for all computers connected to the VPN firewall's LAN. If another device on your
network will be the DHCP server, or if you will manually configure all devices, click Disable
DHCP Server. If the DHCP server is enabled, enter the following parameters:
• Domain Name. (Optional) The DHCP will assign the entered domain to DHCP clients.
• Starting IP Address. Specifies the first of the contiguous addresses in the IP address pool.
Any new DHCP client joining the LAN will be assigned an IP address between this
address and the Ending IP Address. The IP address 192.168.1.2 is the default start address.
• Ending IP Address. Specifies the last of the contiguous addresses in the IP address pool.
The IP address 192.168.1.100 is the default ending address.
• Primary DNS Server. (Optional) If an IP address is specified, the VPN firewall will
provide this address as the primary DNS server IP address. If no address is specified, the
VPN firewall will provide its own LAN IP address as the primary DNS server IP address.
• Secondary DNS Server. (Optional) If an IP address is specified, the VPN firewall will
provide this address as the secondary DNS server IP address.
• WINS Server. (Optional) Specifies the IP address of a local Windows NetBios Server if
one is present in your network.
• Lease Time. Specifies the duration for which a DHCP-provided IP address will be leased
to a client.
• Enable DNS Proxy. When DNS proxy is enabled (the default), the DHCP server will
provide the VPN firewall’s LAN IP address as the DNS server for address name
resolution. If this box is unchecked, the DHCP server will provide the ISP’s DNS server IP
addresses. The VPN firewall will still service DNS requests sent to its LAN IP address
unless you disable DNS Proxy in the firewall settings (see “Attack Checks” on page 4-18).
4. Click Apply to save your settings.
Note: The Starting and Ending DHCP addresses should be in the same subnet as
the LAN IP address of the VPN firewall (the IP Address configured in the
LAN TCP/IP Setup section).
Note: Once you have completed the LAN setup, all outbound traffic is allowed and
all inbound traffic is discarded. To change these default traffic rules, refer to
Chapter 4, “Firewall Protection and Content Filtering.


