


41
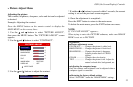
OSD (On Screen Display) Controls
Note:
If “CAN NOT ADJUST” appears...
Set “AUDIO INPUT” on the AUDIO SETUP menu correctly.
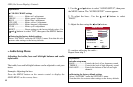
4. Once the adjustment is completed...
Press the EXIT button to return to the main menu.
To delete the main menu, press the EXIT button once again.
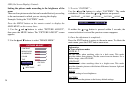
Setting the allocation of the audio connectors
Setting the AUDIO 1, 2, and 3 connectors to the desired input.
Example: Setting “AUDIO INPUT1” to “VIDEO 2”
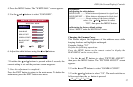
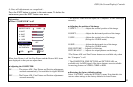
Press the MENU button on the remote control to display the
MAIN MENU on the screen, then...
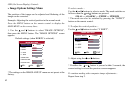
1. Use the and buttons to select “AUDIO SETUP”, then press
the MENU button. The “AUDIO SETUP” screen appears.
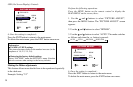
2. Use the and buttons to select “AUDIO INPUT1”.
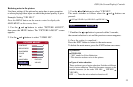
3. To set the AUDIO INPUT1 to “VIDEO2”...
Use the and buttons to select “VIDEO2”.
The mode switches as follows each time the and buttons is
pressed:
The available sources depend on the setting of “BNC INPUT”.
RGB: → VIDEO1↔ VIDEO2 ↔ VIDEO3 ↔ HD1 ←
→ RGB3 ↔ RGB2 ↔ RGB1 ←
COMP: → VIDEO1↔ VIDEO2 ↔ VIDEO3 ↔ HD/DVD1 ←
→ RGB3 ↔ RGB1 ↔ HD/DVD2 ←
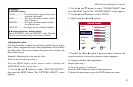
4. Once the adjustment is completed...
Press the EXIT button to return to the main menu.
To delete the main menu, press the EXIT button once more.
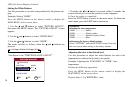
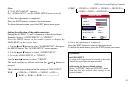
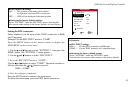
BASS 0
TREBLE 0
BALANCE 0
AUDIO INPUT1 : VIDEO 2
AUDIO INPUT2 : HD 1
AUDIO INPUT3 : RGB 1
AUDIO SETUP
SEL. ADJ. EXIT
EXIT
Information
■ AUDIO INPUT
A single audio input cannot be selected as the audio
channel for more than one input terminal.
■ Restoring the factory default settings
Select “FACTORY” under the SETTING 1 menu.
Note that this also restores other settings to the
factory defaults.