SELECTING NEW SCAN SETTINGS FOR THE SCAN BUTTON 49
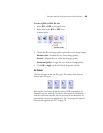
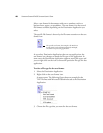
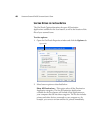
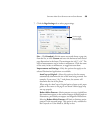
Select Destinations—Select this option to individually choose the
types of applications to include in the list of Destination
Applications. Check the boxes for the type of application to
include.
■ Document Management includes PaperPort and other
applications for processing and keeping track of your scanned
documents.
■ Image Editors include Microsoft Paint and other drawing and
graphics applications.
■ Tex t Editors include Microsoft Word and WordPad, Microsoft
Excel, and other word processing and spreadsheet applications.
Select this option if you want OCR processing to convert your
scanned documents to text that you can edit. See “Scanning with
Optical Character Recognition (OCR)” on page 70 for more
about OCR.
■ PDF applications are for documents scanned to PDF format.
■ Email includes Microsoft Outlook and other email applications.
See “eMail Properties” on page 42 for details about attaching
scanned documents to your email messages.
■ Storage and CD-R/W is for either storing scanned documents
in a folder, or sending them to a CD burner to create a CD
containing the scanned documents. See “Transferring Scanned
Documents to Storage” on page 79 and “Scan and Burn to a
CD” on page 72 for details.
■ Fax and Print is for sending your scanned documents directly to
your printer or fax software for faxing.
■ Sti event forwarding is for using another application’s interface
for scanning. The OneTouch Event Forwarding dialog box opens
so you can select which application to use to continue scanning.
See “Scanning with Event Forwarding” on page 75 for details.
After selecting a new category of Destination Applications, click the
Scan tab to see which ones are added to the list.
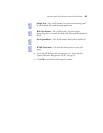
Show Progress Window—Select this option to display the progress
window of the document(s) during scanning.


