


Appendix
Page 63
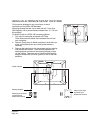
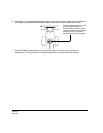
4. Next remove the four attachment screws from the cable cover plate and lift the plate away from
the pen display unit.
5. Place the cable into the cable exit channel. Then reattach the cable cover plate making sure to
use the correct screws for reattachment. (The cable cover plate screws are shorter than the
bearing hub attachment screws.)
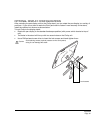
6. Using the screws that came with the bearing cover plate, install the cover plate to protect the
interior of the unit from dust particles.
7. Now, using the appropriate VESA mounting screws, firmly attach Cintiq to the alternate mounting
platform.
8. Reattach the cabling to your computer. As necessary, refer to “Step 1: display installation” on
page 18.
To remove Cintiq from an alternate mounting platform:
1. Turn off your computer and power off Cintiq. Then disconnect all cables from between the unit
and your computer.
2. Remove Cintiq from the alternate mounting platform.
3. Place the pen display unit face down on a flat, soft surface (such as a cloth spread across a
desktop). Remove the bearing cover plate.
4. Remove the cable cover plate and lift the cable out of the cable channel. After freeing up the
cable, replace the cable cover plate.
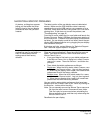
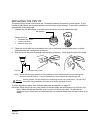
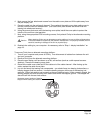
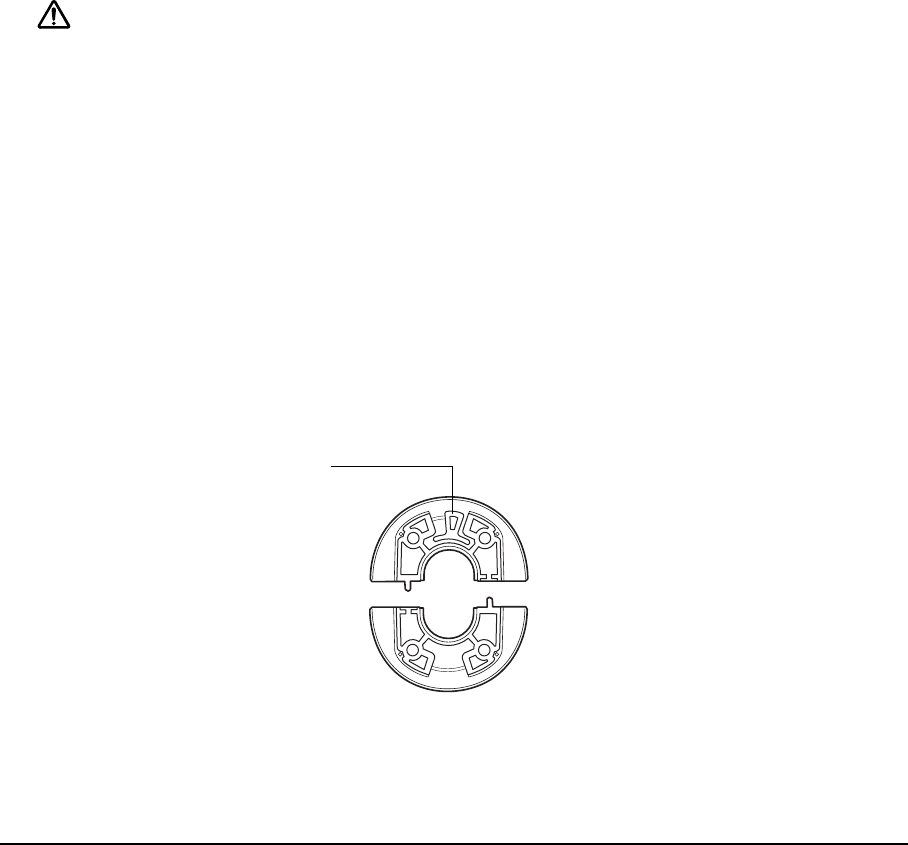
5. Lay out and study the bearing hub components – you should have two bearing hub sections, a
bearing stopper, and four screws. Locate the bearing stopper within one of the bearing hub
sections. (Either hub section can be used, as they are identical parts.) When correctly placed, the
bearing stopper will shift smoothly from side to side within the stopper groove. The stopper will
also sit flush with the rear hub surface.
When attaching Cintiq onto an alternate mounting platform, be sure to follow all instructions
in the documentation supplied by the platform manufacturer. If improperly installed, the unit
could fall, resulting in damage to the unit or physical injury.
Caution
Illustrates correct location of bearing
stopper within bearing hub section.