Features and Specifications
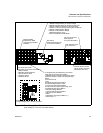
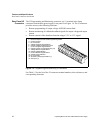
Rear Panel Connectors and Switch
Release 2.1 21
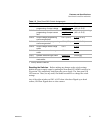
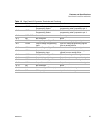
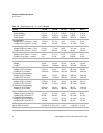
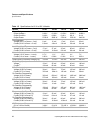
Table 1.2 Rear Panel SW1 Switch Assignments
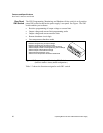
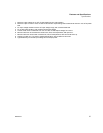
Resetting the Switches Before making any changes to the switch settings,
disable the power supply output by pushing the front panel STANDBY switch to its
IN position. This temporarily shuts down the power supply. The front panel S/D
LED turns on. Then, use any small, flat-bladed screwdriver to change the switch
settings.
Any of the eight switches on SW1 is OFF when it has been flipped up to break
contact, ON when flipped down to close contact.
Switch Function Open
1
1. Factory defaults underlined.
Closed
SW1-1 1 mA current source for resistive
programming of output voltage
Voltage source
programming
Resistive programming
(0-5 k, 0-10 k)
SW1-2 1 mA current source for resistive
programming of output current
limit
Voltage source
programming
Resistive programming
(0-5 k, 0-10 k)
SW1-3 Output voltage programming
source range select
0-5 V (0-5 k) 0-10 V
(0-10 k)
SW1-4 Output current limit programming
source range select
0-5 V (0-5 k) 0-10 V
(0-10 k)
SW1-5 Output voltage monitor range
select
0-5 V 0-10 V
SW1-6 Output current monitor range
select
0-5 V 0-10 V
SW1-7 Remote shutdown logic select HIGH=OFF HIGH=ON
SW1-8 Over temperature shutdown reset
mode select
Auto reset
Latch OFF


