


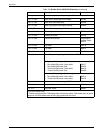
SUPPLIES
A-14 XEROX DOCUPRINT NETWORK PRINTER SERIES INSTALLATION PLANNING GUIDE FOR MODELS 96/4635/180 NPS
MICR tools
You can use the following tools to determine whether the MICR
output is printing within MICR specifications:
• MICR Positioning and Dimension Gauge.
• 8 Power (X) Comparator with MICR grid.
Note: You should use the Custom Transfer Assist Blade to ensure
acceptable MICR line quality on all MICR printing systems that use
nonstandard paper sizes.
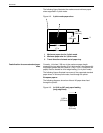
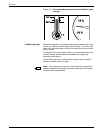
MICR Positioning and Dimension Gauge
The MICR Positioning and Dimension Gauge (part number
600T80025) consists of a thin sheet of flexible plastic attached to the
bottom of a piece of hard thick plastic. The gauge is provided in a kit
that includes a small magnifying glass.
To use the gauge, place the printed output between the two pieces
of plastic. This allows you to compare the MICR output elements
against industry standard output. Using this process, you can verify
the character spacing, check the horizontal and vertical alignment,
and look for spots and voids.
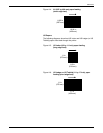
MICR comparator
You use the eight power (X) comparator with MICR grid to compare
the characters on the MICR output to industry standard output.
The comparator is an optical tool that magnifies each character eight
times. It has a built-in scale that measures the size of the MICR
characters and checks for spots and voids (deletions).
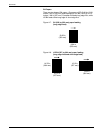
Keep the following in mind when using the 8 Power (X) Comparator
with MICR grid:
• Patterned paper can cause viewing problems. You should use
white paper when you perform quality evaluations.
• The quality of the MICR output may vary, depending on the type
of paper you use.
• Handle the comparator with care. The grid is printed on the
bottom and may be damaged or worn off in time.
You can use the comparator with transmitted or reflected light.