


5.3
User Guide
SENDING A SCAN THROUGH EMAIL
5
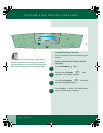
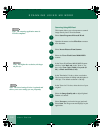
Sending a Scan through Email
In the ControlCentre - Pagis Inbox, click and hold
the left mouse button down on the image you want
to send.
Drag the image to the email application and
release the left mouse button. The Choose Profile
window displays. Click OK. The email Pagis XIF
File window displays.
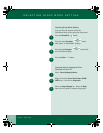
Select the format to send the file in. The three
options are:
• No Conversion: Sends image in a
proprietary Pagis format. If your recipient
does not have Pagis, the file will not open.
• JPEG: Sends most commonly readable
image type.
• Send with Viewer (as self-extracting EXE
file): Sends an application viewer with the
file that allows the file to be opened.
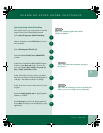
Select OK. The image converts to the type
selected. The email application opens and
automatically attaches your image to a mailnote.
Enter email address information, write your
message and send your email.
You can also open the image you have scanned
and select File>Print, then select QuickLink III
PC Fax as the print destination to send your fax.
Note: This information can be automated by setting
a preset. See chapter 4 of this guide, "Customizing
your WorkCentre."
1
2
3
4
Note: If you have any questions regarding the
email application, see the documentation provided
by your Internet Service Provider.
5
Note: You can scan to any application by dragging
and dropping your scanned image.
6
00-ugm940.book Page 3 Monday, July 31, 2000 3:20 PM