


Submitting print jobs using Windows NT 4.0 drivers
Guide to Submitting Jobs from the Client 5-23
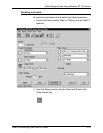
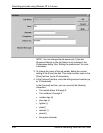
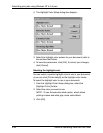
Selecting the paper stock size
NOTE: Unless you explicitly want to print a smaller image on a
larger sheet of paper, or a larger image on a smaller sheet of
paper, make sure that the paper size in the application matches
the paper size in the job ticket.
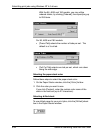
Follow these steps to select the paper stock size:
1. On the Paper Stocks window, click the [Size] list box.
2. Select the size you want to use.
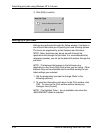
If you click [Custom], enter the required size in the [Width]
and [Length] text boxes, or use the spin button to increase or
decrease the value in the text box. The size you specify must
fall within the ranges indicated below.
For 4850/4890/92C or 2060 models:
• Width ranges from 8.0 to 8.5 inches / 203 to 216 mm
• Length ranges from 10.0 to 14.33 inches / 254 to 364 mm
For 96/4635/180 models:
• Width ranges from 7.00 to 18.25 inches / 178 to 464 mm
• Length ranges from 10.0 to 14.33 inches /254 to 364 mm
You can change the unit of measure using the Preferences...
icon. See “Setting the preferences” for more information.
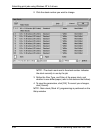
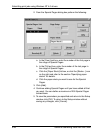
Selecting the paper stock type
Follow these steps to select the paper stock type:
1. On the Paper Stocks window, click the [Type] list box.
2. Click the type you want to use:
• [Standard] selects opaque, medium-weight paper.
• [Transparency] selects plastic sheets (up to 9 inches
wide).
• [Custom] selects any special paper type that is not listed.
Enter the name of the paper type in the Custom Selection
dialog (up to 27 characters).
NOTE: Specifying “plain” as a custom paper type results
in a blank Media Type on the printer controller.