Xerox Mobile Scanner
User’s Guide
36
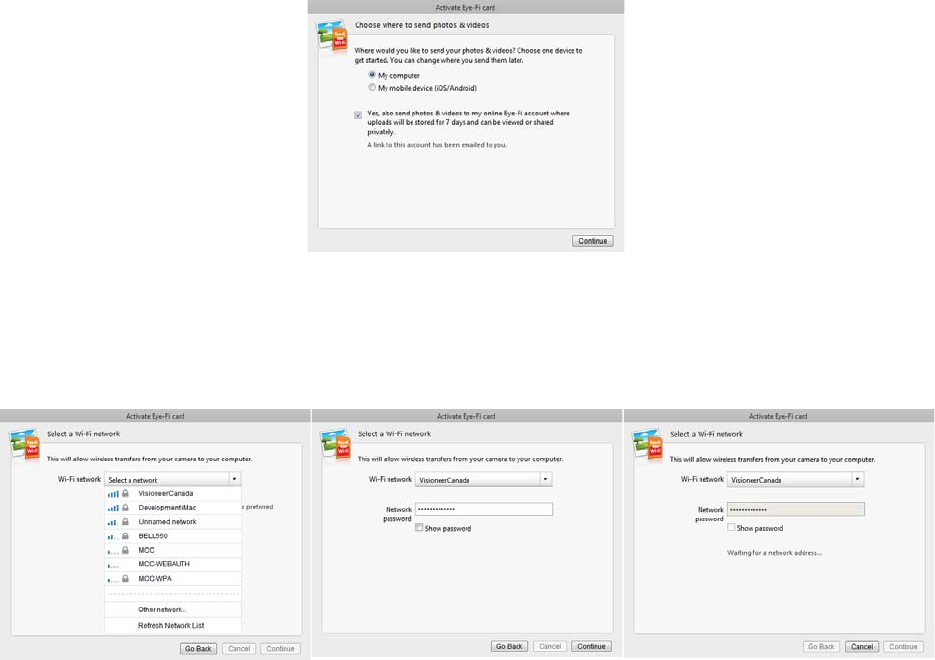
4. At the Choose where to send photos & videos dialogue, select the options you want and then click on
Continue.
My computer—images are transferred to your computer when you are within range of your configured
wireless network. This is the default option and the rest of the instructions in this section proceed from this
option being selected.
However, if you do not have a wireless network, or you do not want to add a wireless network to Eye-Fi card,
select the second option.
My mobile device (iOS / Android)—images are transferred to your mobile device. You will need to download
and install a mobile application onto your device to be able to connect to, and receive images from, the Eye-Fi
card. The Alternate activation option instructions below describes the activation process from selecting this
option.
Yes, also send photos...—when this option is selected, all images are also saved to Eye-Fi View online where
you can access them by logging into your account at www.eye.fi.
5. The next window allows you to select the Wi-Fi network you want to add to the Eye-Fi card. Select your network
from the list and then input the network password. Click Continue.
