Xerox Mobile Scanner
User’s Guide
42
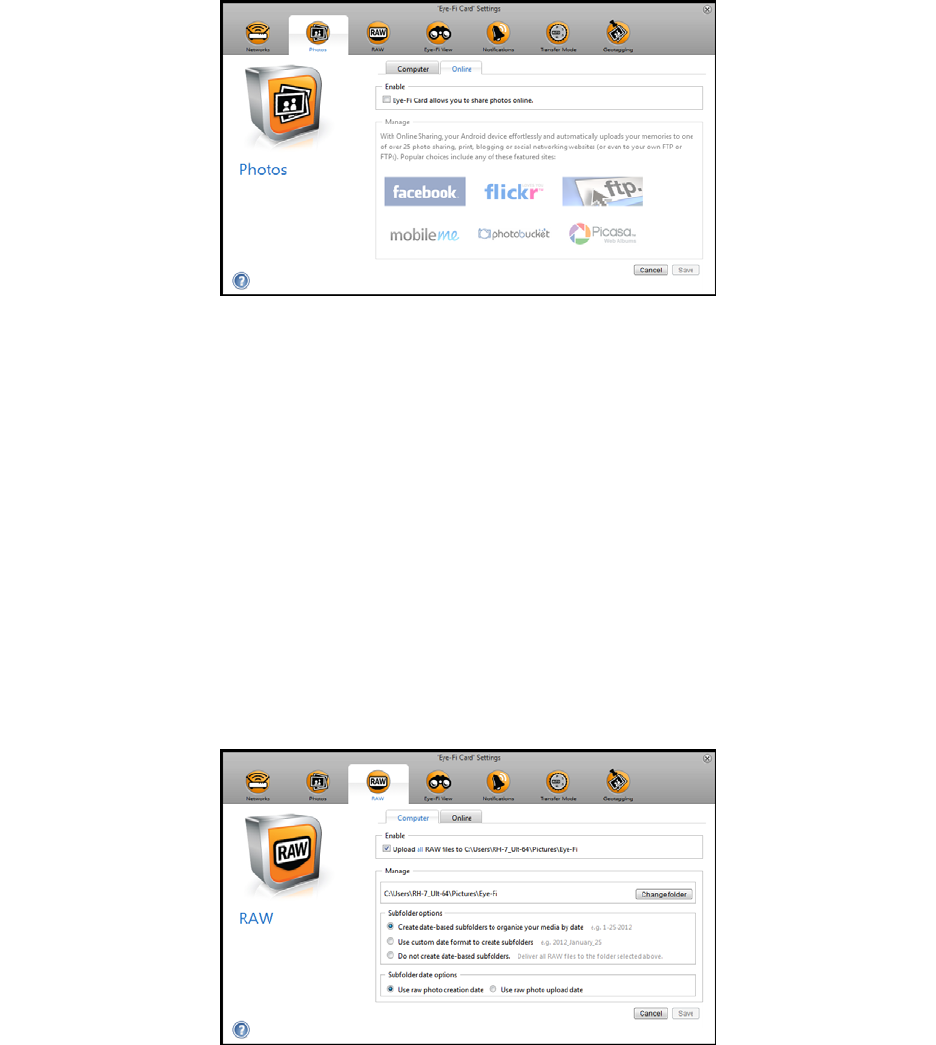
• Online—select Eye-Fi Card allows you to share photos online and then choose the file sharing site that you
want to use for uploading and sharing files. Follow the dialogue prompts on-screen to configure these options.
If your site is not shown in the list click on More Sites, and then select the option to display all sites from the
menu.
If you enable this option the Transfer Mode type Relayed Transfer is automatically enabled.
Note that even if you configure an online sharing site, images are still transferred to your computer unless you
deselect the option to upload photos to your computer on the Computer tab.
Click on the Save button when you are done making changes in this dialogue.
Transferring RAW Files (PDF Files)
Note: you do not need to have the Eye-Fi card connected to the computer to change these settings. The Eye-Fi
Helper utility will route the files to the appropriate locations based on the settings you choose in this window.
Click on the RAW tab to select where you want PDF files transferred. The PDF scan functions are indicated on the
scanner with page icons.
• Computer—select Upload RAW files to this computer option to have files transferred to your computer
when the scanner is in range of a wireless network you configured for the Eye-Fi card. Select the other options
in this dialogue as needed for where you want files saved on your computer. If your computer is not always on,
we recommend that you also enable the Transfer Mode type Relayed Transfer if you want images to be saved
on the Eye-Fi servers, and then routed to your computer the next time you turn it on.
If you have configured a mobile device to receive scanned files, the device that the files will be sent to is
displayed in this dialogue.
Click on the Save button when you are done making changes in this dialogue.
