Xerox Mobile Scanner
User’s Guide
40
Adding or Removing Private Wireless Networks
Note: you will need to have the Eye-Fi Card connected to the computer to configure the network options for the
card. You can either insert the card into the scanner, connect it the computer and turn on the power, or you can use
a standard SDHC memory card reader.
1. Open the Eye-Fi Center software and log in.
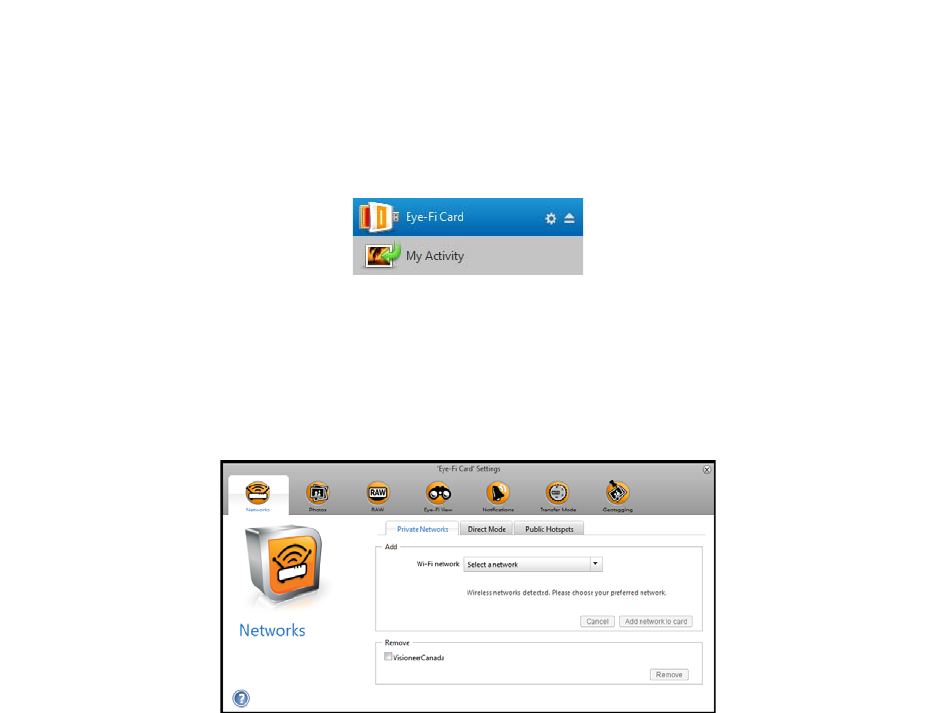
2. Click on the gear icon next to the Eye-Fi card to open the settings window.
Use the Private Networks tab to add or change a wireless network for your Eye-Fi card. You can have multiple
networks configured for the Eye-Fi card so that if you are within range of any one of these networks the Eye-Fi
card will be able to transfer the scanned images.
3. Click the Networks tab, then the Private Networks tab.
Wireless networks that are already configured for the Eye-Fi card are displayed in the lower part of the screen.
4. Click on the drop menu arrow and select a wireless network from the list. This list includes all wireless networks
within range of the Eye-Fi card.
To refresh the list select Refresh Network List.
5. Input the network password and fill in any other fields required to access the network.
6. Click the Add network to card button to use the wireless network.
Other Networks
If you want to connect to a network that you are not within range of at this time, select Other network in the list
and then configure the settings for that network.
1. Enter the name for the other network.
2. Select the security type for the other network from the drop down menu.
3. Enter that network’s password.
4. Select Network is out of range.
5. Click add Network to Card.
