


11
QL Series User Guide
Getting Ready to Print
Battery
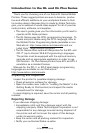
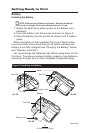
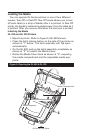
Installing the Battery
NOTE: Batteries are shipped uncharged. Remove protective
shrink-wrap and labels from new battery packs prior to use.
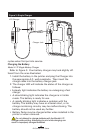
1. Rotate the Belt Clip to allow access to the Battery com-
partment.
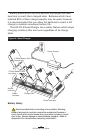
2. Insert the battery into the printer as shown in Figure 2,
3. Rock the Battery into the printer as shown until it locks in
place.
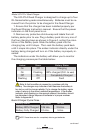
When the battery is first installed, the Control Panel indica-
tors may briefly turn on and then go off which indicates the
battery is not fully charged (see “Charging the Battery” below
and “Operator Controls”).
You must charge the batteries fully before using them for the
first time. To ensure maximum battery capacity, new batteries
should go through two or three complete charge/discharge
continued
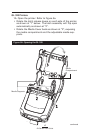
Figure 2: Installing the Battery
Belt Clip
Charger Jack
Battery
Battery
Charger Jack
Belt Clip
QL 420
QL 320
QL 220
Belt Clip