


Prestige 660H/HW Series User’s Guide
99 Chapter 7 Wireless LAN (Prestige 660HW)
7.9 Introduction to OTIST
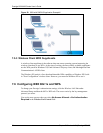
In a wireless network, the wireless clients must have the same SSID and security settings as
the access point (AP) or wireless router (we will refer to both as “AP” here) in order to
associate with it. Traditionally this meant that you had to configure the settings on the AP and
then manually configure the exact same settings on each wireless client.
OTIST (One-Touch Intelligent Security Technology) allows you to transfer your AP’s SSID
and WEP or WPA-PSK security settings to wireless clients that support OTIST and are within
transmission range. You can also choose to have OTIST generate a WPA-PSK key for you if
you didn’t configure one manually.
Note: OTIST replaces the pre-configured wireless settings on the wireless clients.
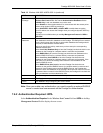
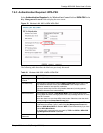
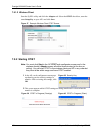
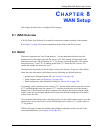
7.9.1 Enabling OTIST
You must enable OTIST on both the AP and wireless client before you start transferring
settings.
Note: The AP and wireless client(s) MUST use the same Setup key.
7.9.1.1 AP
You can enable OTIST using the Reset button or the web configurator.
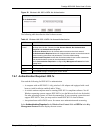
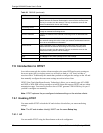
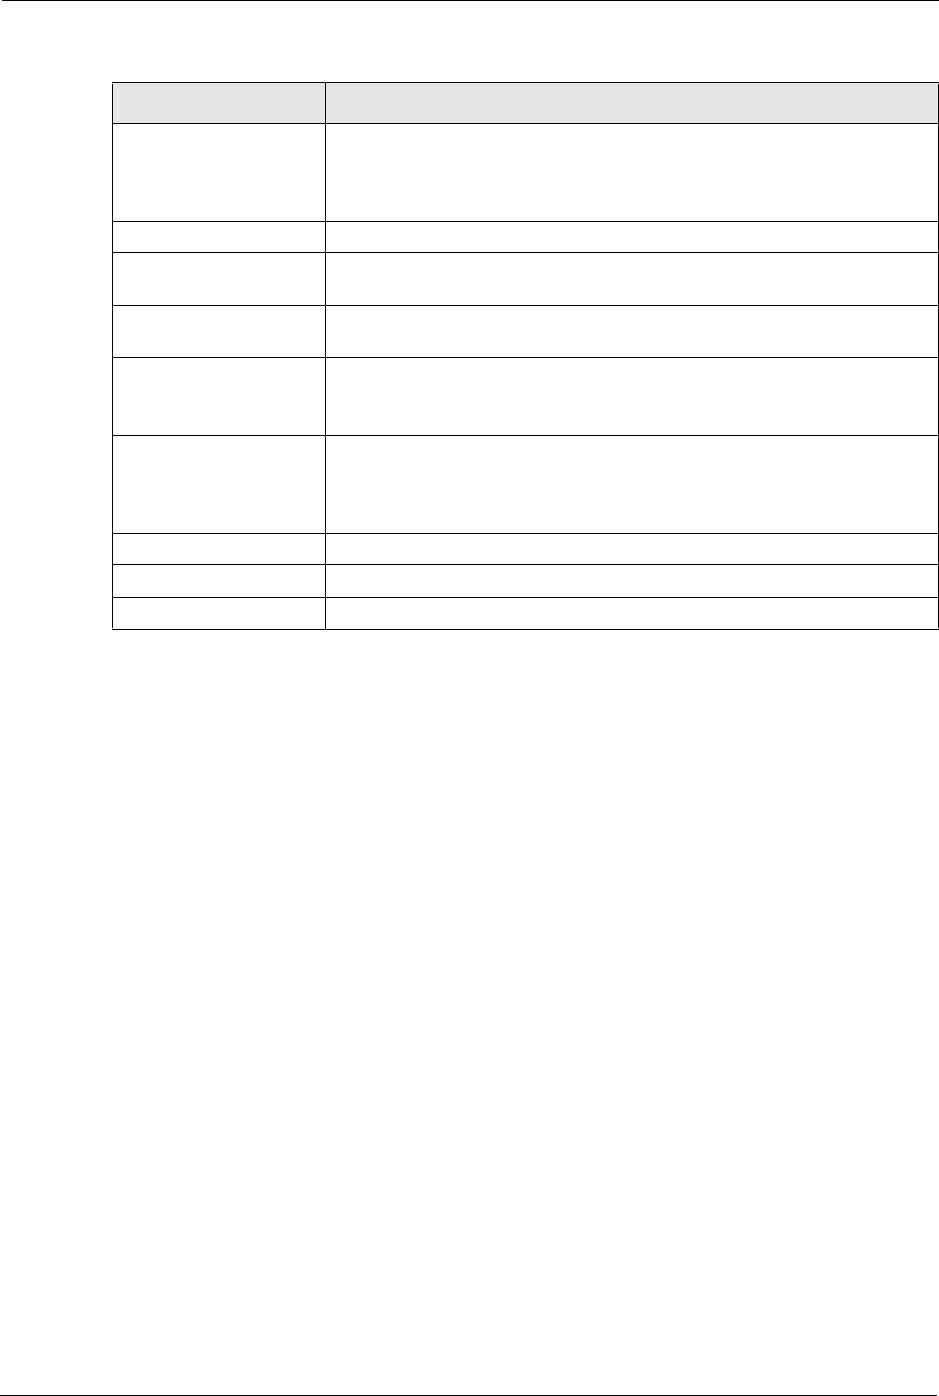
Shared Secret Enter a password (up to 31 alphanumeric characters) as the key to be
shared between the external authentication server and the access points.
The key is not sent over the network. This key must be the same on the
external authentication server and Prestige.
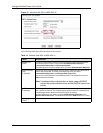
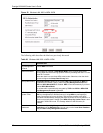
Accounting Server
Active Select Yes from the drop-down list box to enable user authentication
through an external accounting server.
Server IP Address Enter the IP address of the external accounting server in dotted decimal
notation.
Port Number The default port of the RADIUS server for accounting is 1813.
You need not change this value unless your network administrator instructs
you to do so with additional information.
Shared Secret Enter a password (up to 31 alphanumeric characters) as the key to be
shared between the external accounting server and the access points.
The key is not sent over the network. This key must be the same on the
external accounting server and the Prestige.
Back Click Back to go to the main wireless LAN setup screen.
Apply Click Apply to save these settings back to the Prestige.
Cancel Click Cancel to begin configuring this screen again.
Table 23 RADIUS (continued)
LABEL DESCRIPTION