


ZyWALL 5/35/70 Series User’s Guide
Chapter 27 Remote Management 434
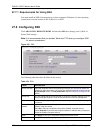
27.4.3 Avoiding the Browser Warning Messages
The following describes the main reasons that your browser displays warnings about the
ZyWALL’s HTTPS server certificate and what you can do to avoid seeing the warnings.
• The issuing certificate authority of the ZyWALL’s HTTPS server certificate is not one of
the browser’s trusted certificate authorities. The issuing certificate authority of the
ZyWALL's factory default certificate is the ZyWALL itself since the certificate is a self-
signed certificate.
• For the browser to trust a self-signed certificate, import the self-
signed certificate into your operating system as a trusted certificate.
• To have the browser trust the certificates issued by a certificate
authority, import the certificate authority’s certificate into your
operating system as a trusted certificate. Refer to
Appendix L on page
738 for details.
• The actual IP address of the HTTPS server (the IP address of the ZyWALL’s port that
you are trying to access) does not match the common name specified in the ZyWALL’s
HTTPS server certificate that your browser received. Do the following to check the
common name specified in the certificate that your ZyWALL sends to HTTPS clients.
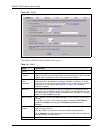
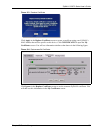
a Click REMOTE MGMT. Write down the name of the certificate
displayed in the Server Certificate field.
b Click CERTIFICATES. Find the certificate and check its Subject
column. CN stands for certificate’s common name (see
Figure 214 on
page 436 for an example).
Use this procedure to have the ZyWALL use a certificate with a common name that matches
the ZyWALL’s actual IP address. You cannot use this procedure if you need to access the
WAN port and it uses a dynamically assigned IP address.
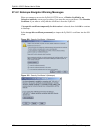
a Create a new certificate for the ZyWALL that uses the IP address (of
the ZyWALL’s port that you are trying to access) as the certificate’s
common name. For example, to use HTTPS to access a LAN port
with IP address 192.168.1.1, create a certificate that uses 192.168.1.1
as the common name.
b Go to the remote management WWW screen and select the newly
created certificate in the Server Certificate field. Click Apply.
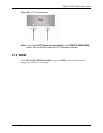
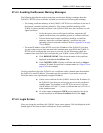
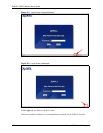
27.4.4 Login Screen
After you accept the certificate, the ZyWALL login screen appears. The lock displayed in the
bottom right of the browser status bar denotes a secure connection.