


2-2 Installation
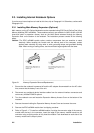
2.3. Installing Internal Notebook Options
If you have no internal options to install at this time, skip to Paragraph 2.4. Otherwise, continue with
Paragraph 2.3.1.
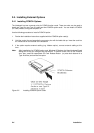
2.3.1 Installing Main Memory Expansion (Optional)
Main memory on the 67x Series Notebooks can be expanded using EDO Small Outline Dual Inline
Memory Modules (EDO soDIMMs). These modules currently are available in 8 MB, 16 MB or 32 MB
sizes and install in expansion memory slots on the Main Board accessed through the Memory
Expansion Door on the bottom of the notebook. The installation process consists of the following
steps:
Caution: The EDO soDIMM module option contains components that are sensitive to static
electricity. When handling the module and the internal parts of the computer, protect
against static electricity by using wrist or ankle grounding straps and grounded working
mats. When moving or storing items, use the anti-static bags supplied with the items.
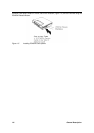
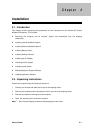
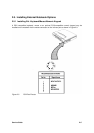
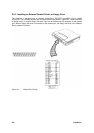
Figure 2-1 Memory Expansion Removal/Replacement
1. Ensure that the notebook is powered off and the AC adapter disconnected from the AC outlet.
Also, ensure that the battery is out of the unit.
2. Disconnect any peripheral device interface cables from the external interface connectors and
remove any installed PCMCIA options.
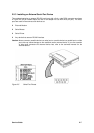
3. Turn the notebook over and locate the Expansion Memory Access Cover on the bottom of the
notebook.
4. Remove the screw holding the Expansion Memory Access Cover and remove the cover.
5. Remove the EDO soDIMM module from its shipping container.
6. Refer to Figure 2-1. To install an soDIMM module, first align the connector edge of the memory
module with the key in the connector. Insert the edge of the memory module board into the
connector using a rocking motion to fully insert the module. Push downward on each side of the
memory module until it snaps in place.