


6-6 Field Service
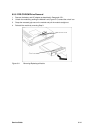
6.5.3 Removing/Replacing the Hard Disk Drive Assembly
The procedure for removing and replacing the Hard Disk Drive assembly is as follows:
1. Power down the notebook, disconnect the AC adapter, if installed, and remove the battery
pack as described in Paragraph 6.5.1.
2. Disconnect any peripheral device interface cables from the external interface connectors and
remove any installed PCMCIA options.
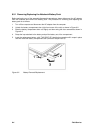
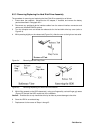
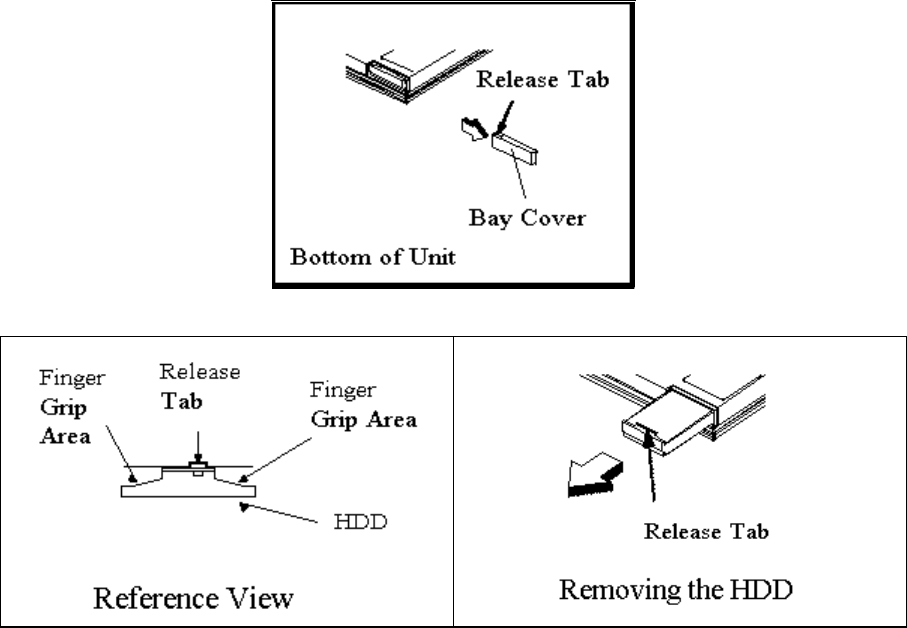
3. Turn the computer over and locate the release tab for the hard disk drive bay cover (refer to
Figure 6-4).
4. While pressing slightly on the release tab (Figure 6-4), slide the cover to the right and set aside.
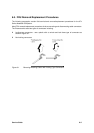
Figure 6-4 Removing the HDD Bay Cover
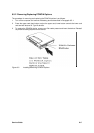
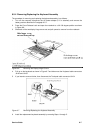
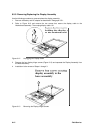
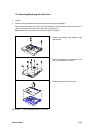
Figure 6-5 Removing/Replacing the Hard Disk Drive Module
5. While lifting upward on the HDD release tab ( using your fingernails), use both finger grip areas
(Figure 6-5) and pull the HDD module out of the notebook.
Caution: Exercise care to only handle the drive by its sides to prevent damage to the drive.
6. Store the HDD in an antistatic bag.
7. Replacement is the reverse of Steps 1 through 5.