


47
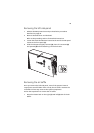
Installing the four-bay hot-plug SATA HDD cage
Note: Before installing a SATA HDD cage in your system, make
sure you install a SATA RAID controller. The SATA RAID controller
must be compatible with your system and OS, and appropriate
drivers must also be installed according to the RAID controller
manufacturer’s installation instructions. Refer to “Installing an
expansion card” on page 69 and for instructions on how to install
the RAID controller into the PCI slot.
To purchase a SATA RAID controller, contact your local Acer
representative or order directly from http://www.acer.com/
.
1 Observe the ESD precautions and pre-installation procedures
described on page 39.
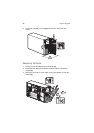
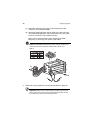
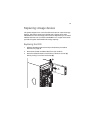
2 Remove the four screws that secure the cover of the empty HDD
bay, then detach the cover.
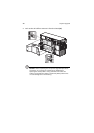
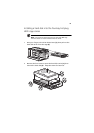
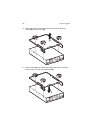
3 Insert the hot-plug cage into the housing with the backplane
facing the rear of the chassis, then tighten the four thumbscrews
to secure the cage to the chassis.
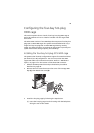
Important: If a four-bay hot-plug SCSI HDD cage is already
installed in the top HDD bay, you must configure the J5 jumper
settings on the SATA backplane. Refer to step (1) illustrated on
page 48.
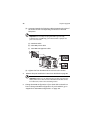
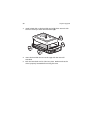
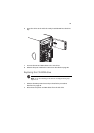
4 Connect the following cables to their corresponding connectors on
the SATA RAID backplane, mainboard and adapter:
(1) Attach the SATA data cable to the SATA HDD connector on the
backplane (2), then connect the other end of the cable to the
SATA connector on the RAID controller.
Note: SATA connectors on the controller are keyed. Make sure the
SATA data cables are properly connected to its corresponding
connectors on the SATA RAID controller.
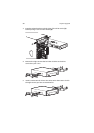
(2) Attach the SATA cage management cable to the J11 connector
on the backplane (3), then connect the other end of the cable
to the JP24 connector on the mainboard.