


User’s Manual 1-25
GETTING
STARTED
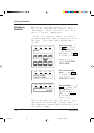
9. A dialog appears prompting the user to type the Printer name.
Type an appropriate name or use the one supplied and click
“Next>”. The next dialog prompts the user to print a test page.
10.Select “Yes” or “No” and click “Finish”. The self test printing
should be done to check for correct connection and settings of the
printer.
11.When all files have been copied and the driver is installed, the
selected printer’s icon is added in the Printers (the screen used in
step 1).
The Fujitsu PrintPartner 14ADV Windows 95 FPS Printer Driver is
now installed.
For further details, see the appropriate country version of the driver’s
Readme file.
Notice:
To avoid possible printer errors, perform the following settings.
• Change the parameter of “Data Compression” in the PostScript tab of
the FPS2 driver Properties window to “Medium” to avoid a PS error.
• Change the parameters of “Halftone” in the Graphics tab of the FPS2
driver Properties window to “Use Settings Below”, “80.0” (Frequency),
and “45.0” (Angle) to avoid too dark printingor less.
You can also install the driver from MarkVision.
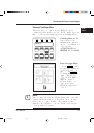
1. Click “Add Printer” of the Printer Installation.
2. Printer manufacturers and names are listed. Click “Have Disk...”.
The “Install from disk” dialog is displayed.
3. Follow the procedures from step 6 in the preceding procedures.
☞
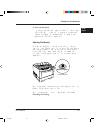
Installing the Printer Driver
04 Chapter 1 07.08.1997, 11:39 Uhr25