5. Mounting the ACSAR into the Console
5. MOUNTING THE ACSAR INTO THE CONSOLE
Before proceeding to the mechanical installation of the ACSAR unit, resulting in opening the console, be sure
the console has been switched off totally (Refer to the installation manual for switching off the console).
5.1 Installation of the ACSAR
Necessary tools
Cross point screw driver of 5 mm.
How to install the ACSAR unit in the console
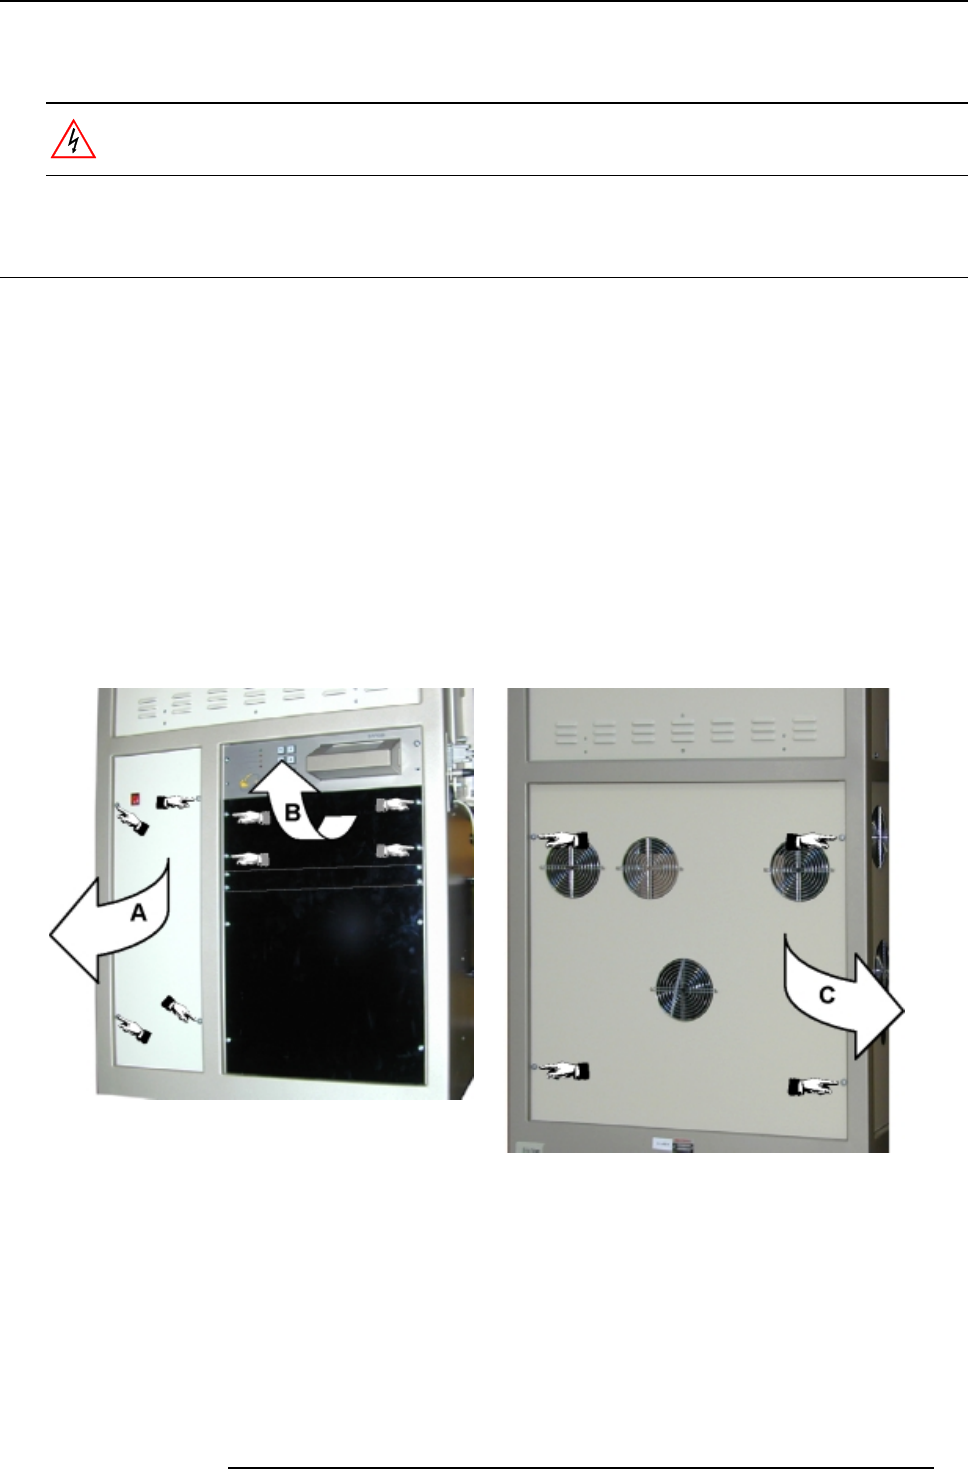
1. To be able to install the ACSAR unit, remove the following covers on the console:
- Dummy cover plate (B): remove the 4 screws securing plate to console and remove the cover. Retain screws for the fixation
of the ACSAR unit. (image 5-1)
- Side cover with power switch (A): remove the 4 screws securing plate to console. Take the cover out of console frame and
put it beside the console (cover displacement limited by the ground cable and the power switch connection). Retain screws
for reinstallation of the cover (image 5-1).
- Main power cover (C): remove the 4 screws securing plate to console and remove the cover (cover displacement limited by
the ground cable). Retain screws for reinstallation of the cover. (image 5-2)
2. Carefully slide the ACSAR unit on its place in the console, taking care that the bottom of the unit rest on the provided support
(D). (image 5-3, image 5-4)
3. Secure the position of the unit with the 4 retained screws. (image 5-5)
4. Continue with the electrical connections of ACSAR power, communication and DVI.
Image 5-1
Cover removal left side console
A Side cover with power switch
B Dummy cover plate
Image 5-2
Cover removal right side console
R5976519 ACSAR 12122002 13


