


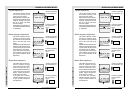


GUIDED ADJUSTMENT MODE
R5975059A BARCOVISION 708 200498
GUIDED ADJUSTMENT MODE
R5975059A BARCOVISION 708 200498
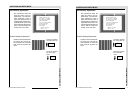
7-20
GUIDED ADJUSTMENT MODE
7-20
GUIDED ADJUSTMENT MODE
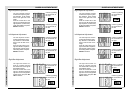
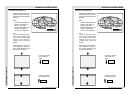
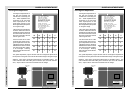
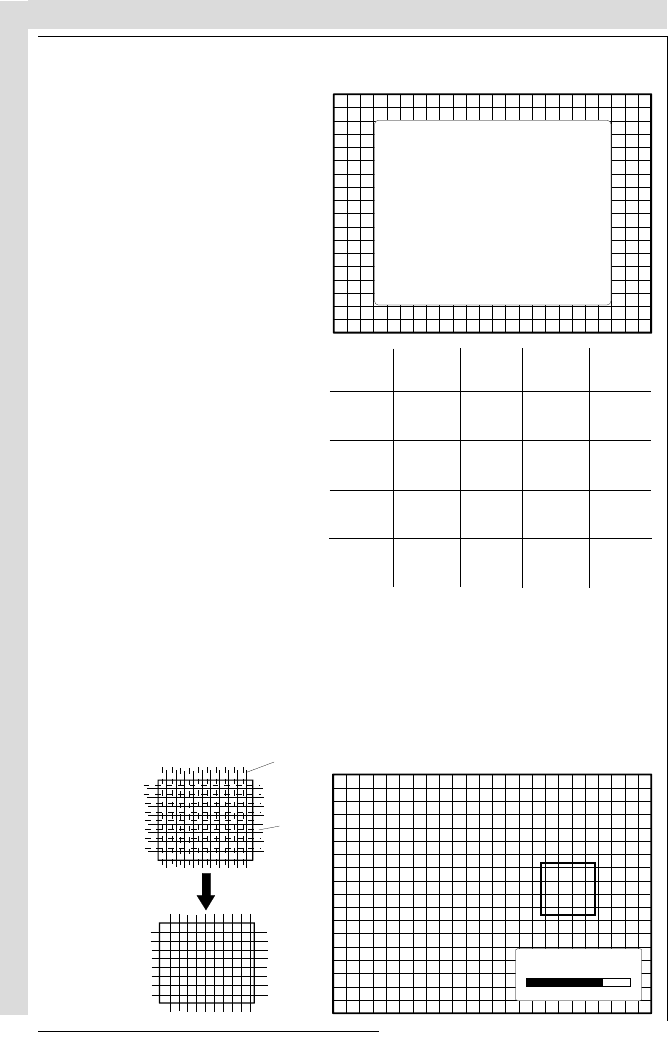
Convergence Adjustment
Convergence adjustments af-
fect both the horizontal and
vertical lines of the setup pat-
tern. These adjustments are
performed on the red image
while superimposed on the
green image and then on the
blue image while superimposed
on the green image.
The screen area is divided into
25 areas. Within each area it is
possible to move the horizontal
and vertical lines of the red and
blue picture until they coincide
with the green lines.
Use the control disc to make
horizontal and vertical conver-
gence adjustments in the area
indicated by the box. Pressing
ENTER will move the box to the
next area of the setup pattern
to be converged. Pressing
EXIT will move the box back to
the last area.
The guided adjustment program will start with the convergence adjustment of
the red picture on the green and continues with the blue image on the green image.
Attention : when green convergence adjustments are available (option). The
control software starts with these green corrections (the menu will indicate it
also). Adjust until the vertical and horizontal lines are straight.
12345
8
9
6
7
15
10
23
121820
21
19 11
13
24
22
14
16
25
17
red image
green image
CONVERGE
ADJUSTMENT
70
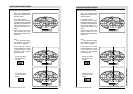
CONVERGENCE
START WITH GREEN ONLY,
THEN RED ON GREEN,
THEN BLUE ON GREEN.
USE THE ARROW KEYS FOR
HORIZONTAL AND VERTICAL
ADJUSTMENTS IN THE AREA
INDICATED BY THE BOX.
<ENTER> WILL MOVE
THE BOX TO THE NEXT AREA
TO BE CONVERGED, AND
<EXIT> WILL MOVE IT BACK
TO THE PREVIOUS.
<ENTER> to continue
<EXIT> to return
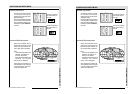
Convergence Adjustment
Convergence adjustments af-
fect both the horizontal and
vertical lines of the setup pat-
tern. These adjustments are
performed on the red image
while superimposed on the
green image and then on the
blue image while superimposed
on the green image.
The screen area is divided into
25 areas. Within each area it is
possible to move the horizontal
and vertical lines of the red and
blue picture until they coincide
with the green lines.
Use the control disc to make
horizontal and vertical conver-
gence adjustments in the area
indicated by the box. Pressing
ENTER will move the box to the
next area of the setup pattern
to be converged. Pressing
EXIT will move the box back to
the last area.
The guided adjustment program will start with the convergence adjustment of
the red picture on the green and continues with the blue image on the green image.
Attention : when green convergence adjustments are available (option). The
control software starts with these green corrections (the menu will indicate it
also). Adjust until the vertical and horizontal lines are straight.
12345
8
9
6
7
15
10
23
121820
21
19 11
13
24
22
14
16
25
17
red image
green image
CONVERGE
ADJUSTMENT
70
CONVERGENCE
START WITH GREEN ONLY,
THEN RED ON GREEN,
THEN BLUE ON GREEN.
USE THE ARROW KEYS FOR
HORIZONTAL AND VERTICAL
ADJUSTMENTS IN THE AREA
INDICATED BY THE BOX.
<ENTER> WILL MOVE
THE BOX TO THE NEXT AREA
TO BE CONVERGED, AND
<EXIT> WILL MOVE IT BACK
TO THE PREVIOUS.
<ENTER> to continue
<EXIT> to return