Troubleshooting and routine maintenance
89
C
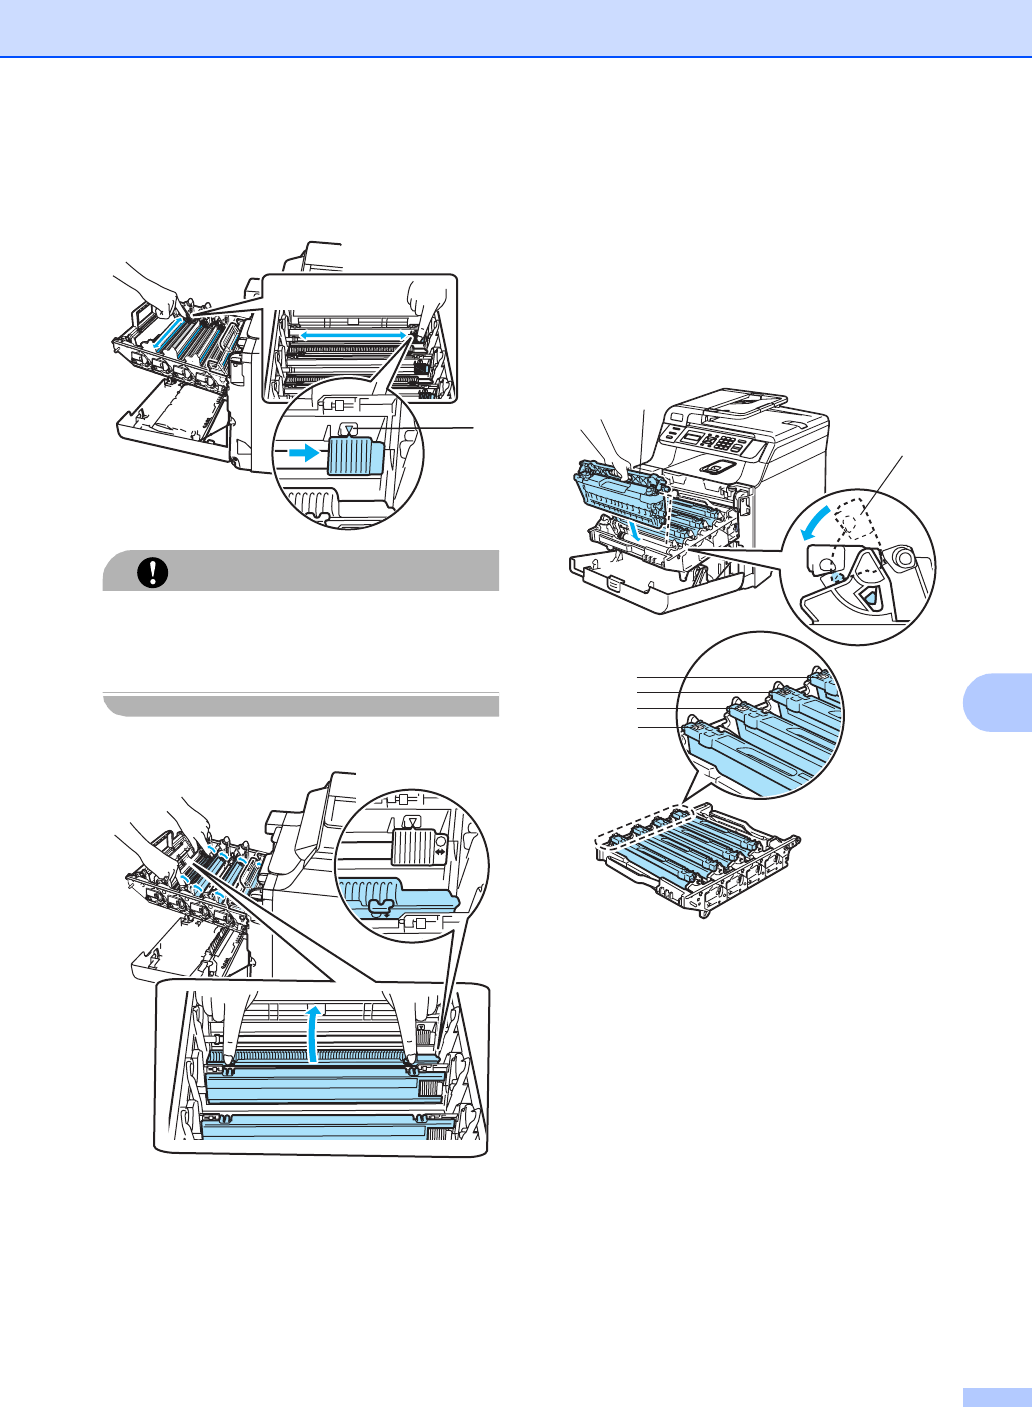
f Clean the corona wire inside the drum
unit by gently sliding the green tab from
left to right and right to left several times.
CAUTION
Be sure to return the tab to the home
position (b) (1). If you do not, printed pages
may have a vertical stripe.
g Close the corona wire cover.
h Repeat e to g to clean each of the
remaining corona wires.
i Hold the handle of the toner cartridge
and slide the toner cartridge into the
drum unit. Make sure that you match the
toner cartridge color to the same color
label on the drum unit, and make sure
that you fold down the toner cartridge
handle (A) once the toner cartridge is in
place. Repeat this for all the toner
cartridges.
1 Cyan
2 Magenta
3 Yellow
4 Black
1
1
2
A
A
1
2
3
4


