


7 - 16 ROUTINE MAINTENANCE AND CONSUMABLE REPLACEMENT
3
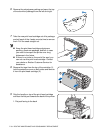
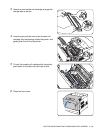
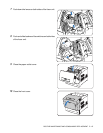
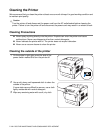
Push and slide forward the switches on both sides
of the fuser unit.
4
Lift the levers on both sides of the fuser unit.
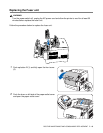
5
Hold the levers on both sides as you remove the
fuser unit from the printer carfully.
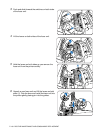
6
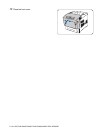
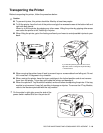
Unpack a new fuser unit and lift the levers on both
sides (1). Grip the lever and install the fuser unit into
the printer gently placing pin into the guides.