


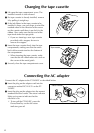
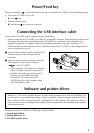

8
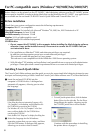
Installing P-touch Editor Ver. 3.1
The P-touch Editor Ver. 3.1 software includes a vari-
ety of more complex functions for printing barcodes
and images, enabling you to design just about any
label that you can imagine. Install the P-touch Edi-
tor Ver. 3.1 software on a PC as described below.
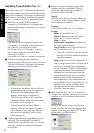
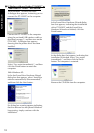
1 Insert the enclosed CD-ROM into the
computer’s CD-ROM drive. A dialogue box
automatically appears, allowing you to select
the language.
If the dialog box does not automatically appear, click
“My Computer” on the desktop, and then double-click
the CD-ROM drive containing the CD-ROM.
(For Windows
®
XP, click “My Computer” in the Start
menu, and then double-click the CD-ROM drive
containing the CD-ROM.)
Next, double-click “Setup.exe” to display the dialog box.
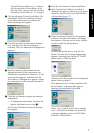
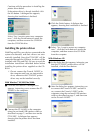
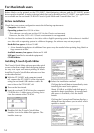
2 Select the language for the Windows
®
operating system that you are using, and then
click the OK button. A dialogue box appears,
allowing you to select what to install.
To install just the printer driver, click the
bottom button (Driver) on the right side.
The first Driver Setup dialogue box
appears, informing you that the PT-
2420PC printer driver will be installed.
Continue with the procedure in
Installing
the printer driver
on page 9.
To install the P-touch Quick Editor
software, click the left button (P-touch
Quick Editor). Then, continue with the
procedure in
Installing P-touch Quick
Editor
on page 6.
3 Click the top button (P-touch Editor) on the
right side. The InstallShield
®
Wizard for
installing the P-touch Editor Ver. 3.1 software
starts up, and then the Welcome dialogue
box appears.
4 Follow the instructions that appear and
continue with the installation. During
installation, the following installation
methods will be available.
Typical
All of the basic options (P-touch Editor Ver.
3.1, Clip art, Auto Format templates, Help,
and 13 fonts) are installed.
Compact
Only P-touch Editor Ver. 3.1 is installed.
Custom
Editor: P-touch Editor Ver. 3.1
Clip Art: Illustrations for the P-touch
Editor Ver. 3.1 Clip Art function
Fonts: 13 fonts
Auto Format Templates: Templates for
the Auto Format function
User’s Guide: User’s Guide (HTML) for
the P-touch Editor Ver. 3.1
The User’s Guide can also be viewed
from the CD-ROM without installing it
onto the computer.
Help: Help files for P-touch Editor Ver. 3.1
If the Change button can be clicked while
an option is selected, sub-components
can be selected. Click the Change button
to display the Select Sub-components
dialogue box, and then select the sub-
components that you wish to install by
putting a check mark beside them. If
certain options or sub-components are
not installed, some P-touch Editor Ver. 3.1
functions may not be available. After
selecting the desired sub-components,
click the Continue button.
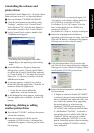
5 After P-touch Editor Ver. 3.1 is installed, a
dialogue box appears, allowing you to select
whether or not to install the printer driver.
To install the printer driver, click the Yes
button. The first Driver Setup dialogue box
appears, informing you that the PT-2420PC
printer driver will be installed.
For Windows®