


4
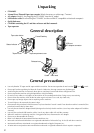
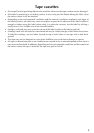
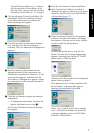
Changing the tape cassette
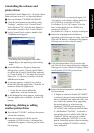
1 Lift open the tape compartment cover. The
installed cassette is also released.
2 If a tape cassette is already installed, remove
it by pulling it straight up.
3 If the ink ribbon in the tape cassette to be
installed is loose, use your finger to wind the
toothed wheel in the direction of the arrow
on the cassette until there is no slack in the
ribbon. Also, make sure that the end of the
tape feeds under the tape guide.
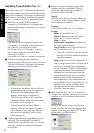
If you are inserting a new tape cassette
provided with a stopper, be sure to
remove the stopper.
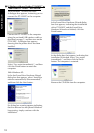
4 Insert the tape cassette firmly into the tape
compartment, making sure that the entire
back of the cassette touches the bottom of
the compartment.
When inserting the tape cassette, make
sure that the ink ribbon does not catch on
the corner of the metal guide.
5 Securely close the tape compartment cover.
Tape cassette
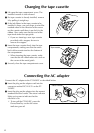
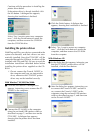
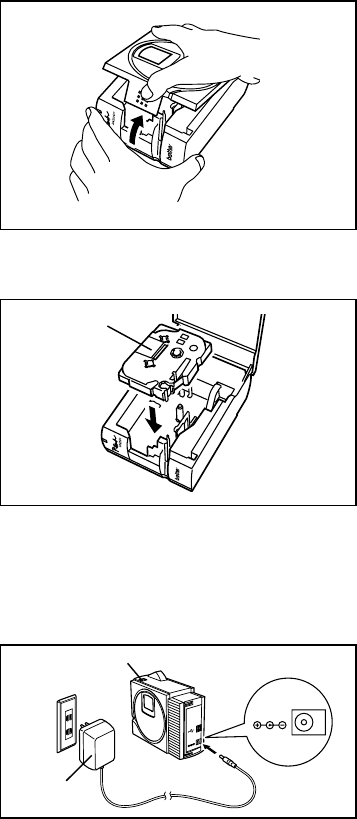
Connecting the AC adapter
Connect the AC adapter to the PT-2420PC as described below.
1 Insert the plug on the adapter cord into the
connector marked DC IN 9.5V on the PT-
2420PC.
2 Insert the plug on the adapter into the nearest
standard electrical outlet. The status indicator
lights up in green to indicate that the
machine is on.
To turn off the PT-2420PC, press the
Power/Feed key so that the status
indicator goes off.
Status indicator
AC adapter
D
C
I
N
9
.
5
V
DC IN 9.5V