


Adding Printers in NetWare
AXIS 1650 User’s Manual 37
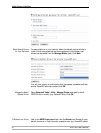
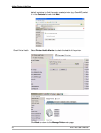
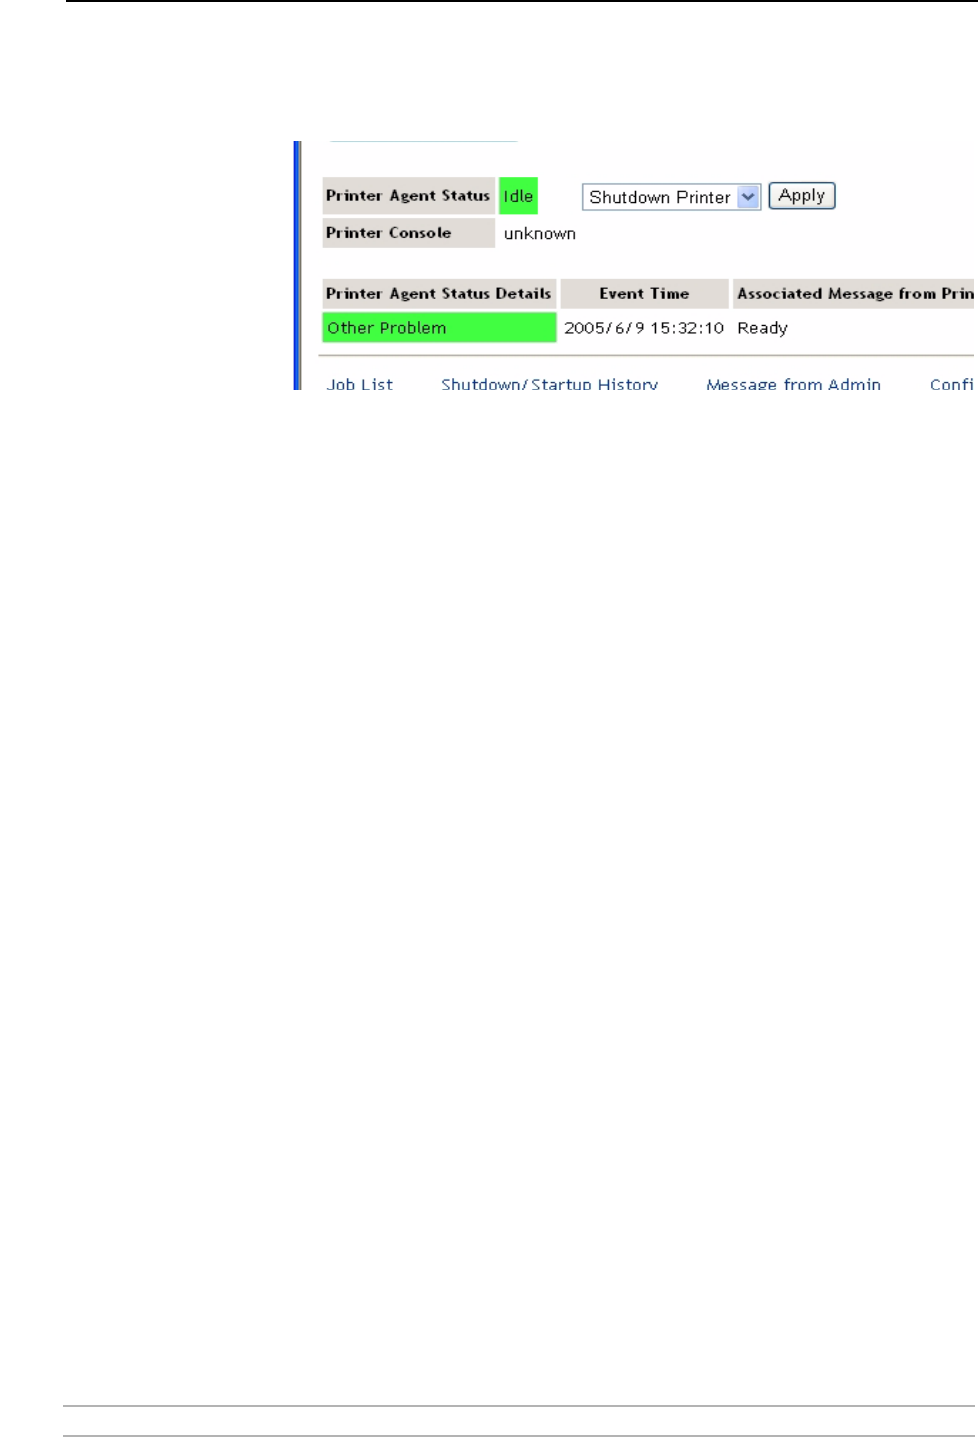
Enable IPP Access In the Manage Printer main page, click the Client Support tab.
To enable IPP access, check Enable IPP access, click Apply and OK.
Make the Newly
Created Printer
Available (Optional)
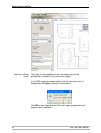
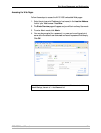
Using the iPrint Map Designer tool, you can quickly make the newly
printer available and accessible simply by clicking on its icon in a floor
plan, showing where the printers are located.
The tool lets you import own floor plans as background images that can
be used to drag-and-drop printers onto actual locations. These maps are
then published on a Web server so users can install printers that are
closest to their location.
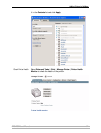
1. Using Microsoft Explorer, start maptool.html, which can be found in
<sysvol>\login\ippdocs\.
2. Select a map from the Background drop-down list.
3. Select a Printer icon for the newly created printer and drag it to a suitable
position in the design area, i.e. the floor plan.
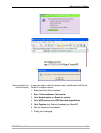
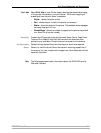
4. Next to the Printer List field, click the Browse icon and enter the IP address
or DNS name of the server where the Print Manager is running (e.g.
171.15.115.109).
5. From the Printer List, select the printer agent you want associated with this
printer icon (e.g. CanonMF). The Printer URL and Mouse Over Text will
automatically be filled in with the printer agent information.
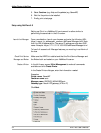
Printer URL is the URL created for the printer when IPP was enabled for the
printer (e.g. ipp://171.15.115.109/ipp/CanonMF). You should not need to
change the URL.
The Mouse over text will by default display the printer agent's name. You
can override this information by entering the text you want to display when
a user moves the mouse over the printer icon (e.g. CanonMF).
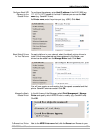
6. In the Printer caption field, enter the information to display (e.g. AXIS 1650
Canon MF).
7. Click Save and save the map (e.g. as AXIS1650_usb).