


2-21
Cisco MDS 9100 Series Hardware Installation Guide
OL-16187-01
Chapter 2 Installing the Cisco MDS 9100 Series
Installing Cisco MDS 9134 48-Port and 64-Port Stackable Bundles
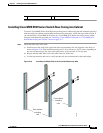
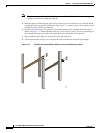
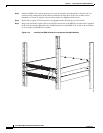
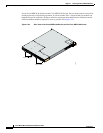
Step 4 Stabilize the switch in the rack by attaching the front rack-mount brackets to the rear rack-mounting
rails:
a. Insert two screws (12-24 or 10-32, depending on rack type) through the holes in one of the front
rack-mount brackets and into the threaded holes in the back rack-mounting rail (see Figure 2-17).
For racks with square holes, first install the 12-24 cage nuts.
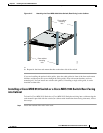
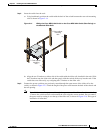
Figure 2-17 Attaching the Cisco MDS 9134 Switch or the Cisco MDS 9124 Switch (Rear-Facing) to
the Cabinet
b.
Repeat for the front rack-mount bracket on the other side of the switch.
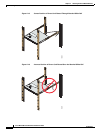
Tip If the chassis exceeds the 1-RU space on the low side of the rack, you may have difficulty installing other
equipment. In this situation, loosen the screws on the front and back rails of the chassis and raise it to
the top of the RU space by pushing the chassis up until it cannot go any further. Then retighten the screws
while keeping the chassis in the elevated position.
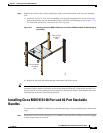
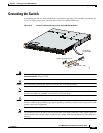
Installing Cisco MDS 9134 48-Port and 64-Port Stackable
Bundles
To install two Cisco MDS 9134 Switches to stack and expand up to 48 ports and/or 64 ports, follow these
steps:
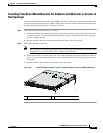
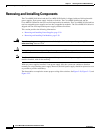
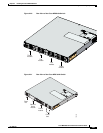
Step 1 Ensure that two boxes each consisting of a Cisco MDS 9134 Switch with a 10-Gbps transceiver plugged
in and a copper cable are received.
182464
Front cabinet
mounting
rails
Rear cabinet
mounting
rails