


Chapter 4
Advanced Configuration
6
4-Port SSL/IPSec VPN Router
Chapter 4:
Advanced Configuration
Overview
For your convenience, use the Router’s web-based utility
to set it up and configure it. This chapter will explain all of
the functions in this utility.
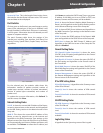
These are the main tabs of the utility: System Summary,
Setup, DHCP, System Management, Port Management,
QoS, Firewall, IPSec VPN, SSL VPN, SNMP, Log, Wizard,
Support, and Logout. Additional tabs will be available
after you click one of the main tabs.
Before You Begin
The Router’s web-based utility and SSL VPN Portal
support Internet Explorer 6.0 (or higher) and Netscape
Communicator 8.0 (or higher) running in a Windows
environment.
To configure the SSL VPN software, your web browser must
have SSL, JavaScript, ActiveX, and cookies enabled (these
settings are enabled by default). If the settings are already
enabled, proceed to the next section, “How to Access the
Web-Based Utility”. If the settings are disabled, you should
enable them before configuring the Router. Proceed to
the instructions for your web browser.
Internet Explorer 6.0 or Higher
Open Internet Explorer.
Click Tools.
Click Internet Options.
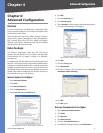
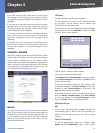
Click the Advanced tab.
Select Use SSL 2.0 and Use SSL 3.0.
Internet Explorer > Tools > Internet Options > Advanced
1.
2.
3.
4.
5.
Click OK.
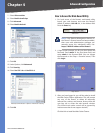
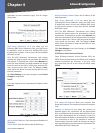
Click the Security tab.
Click Custom Level.
Select Enable for Active scripting, Allow paste operations
via script, and Scripting of Java applets.
Internet Explorer > Tools > Internet Options > Security
Click OK.
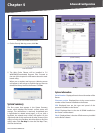
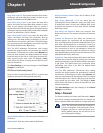
Click the Privacy tab.
Click Advanced.
Deselect (remove the checkmark from) Override
automatic cookie handling.
Internet Explorer > Tools > Internet Options > Privacy
Click OK.
Click OK again.
Netscape Communicator 8.0 or Higher
Open Netscape Communicator.
Click Tools.
Click Options.
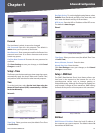
Click Site Controls.
Click the Trust Preferences tab.
In the Master Settings section, click I’m Not Sure.
6.
7.
8.
9.
10.
11.
12.
13.
14.
15.
1.
2.
3.
4.
5.
6.