


Chapter 4
Advanced Configuration
20
4-Port SSL/IPSec VPN Router
NOTE: To support NetBIOS for DHCP and Virtual
Passage clients, the Router uses two methods.
(Virtual Passage is an ActiveX-based VPN client
that provides full network connectivity for
Windows users. It allows remote access to the
Router’s network through a secure connection.)
First, when the DHCP and Virtual Passage clients
receive dynamic IP addresses from the Router,
it automatically includes the information of
the WINS server to support NetBIOS. Second,
if a user sets up a static IP address, then the IP
address, subnet mask, default gateway, and
DNS server settings must be configured on
the Internet Protocol (TCP/IP) screen of the
Windows operating system. Then the WINS IP
address must be configured on the advanced
TCP/IP screen. (For more information, refer to
Windows Help.)
Click Save Settings to save your changes, or click Cancel
Changes to undo them.
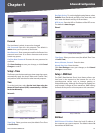
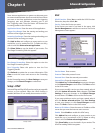
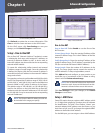
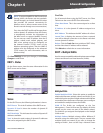
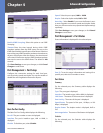
DHCP > Status
On the Status screen, view the status information for the
DHCP server and its clients.
DHCP > Status
Status
For the DHCP server, the following information is shown:
DHCP Server This is the IP address of the DHCP server.
Dynamic IP Used It shows the number of dynamic IP
addresses used.
DHCP Available This indicates the number of dynamic IP
addresses available.
Total It shows the total number of dynamic IP addresses
that can be assigned by the DHCP server.
Client Table
For all network clients using the DHCP server, the Client
Table shows the current DHCP Client information:
Client Host Name This is the name assigned to a client
host.
IP Address It is the dynamic IP address assigned to a
client.
MAC Address This indicates the MAC address of a client.
Leased Time It displays the amount of time a network
user will be allowed connection to the Router with their
current dynamic IP address.
Delete Click the Trash Can icon to delete a DHCP client,
and the client host’s IP address will be released.
Click Refresh to refresh the on-screen information.
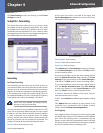
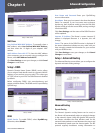
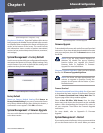
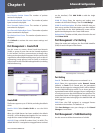
DHCP > Multiple VLANs
Use this screen to establish relationships between multiple
subnets and Virtual Local Area Networks (VLANs).
DHCP > Multiple VLANs
Multiple VLANs
Enable Multiple VLANs Select this option to establish a
relationship between multiple subnets and VLANs. If you
enable this option and the multiple subnets and VLANs are
not enabled, then the Router will prompt you to configure
and enable the multiple subnets and VLANs.
VLAN ID The VLANs are configured on the Port
Management > Create VLAN screen (by default, all VLANs
created on this screen are part of the default subnet).
The VLAN IDs you assigned are displayed on the Multiple
VLANs screen.
Multiple Subnet Multiple subnets define different IP
networks using the subnet mask. They are created after
multiple VLANs are created. (If you want to change the
settings of VLAN 1, then use the Setup > Network screen