


Chapter 4
Advanced Configuration
48
4-Port SSL/IPSec VPN Router
e-mailed at the same time. The default is Severity0_
Emergency.
Click E-mail Log Now to immediately send the log to the
address in the Send E-mail to field.
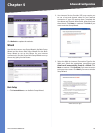
Log Setting
Alert Log
Syn Flooding Select this option if you want Syn Flooding
events to trigger an alert.
IP Spoofing Select this option if you want IP Spoofing
events to trigger an alert.
Win Nuke Select this option if you want Win Nuke events
to trigger an alert.
Ping of Death Select this option if you want Ping of
Death events to trigger an alert.
Unauthorized Login Attempt If this option is enabled,
Unauthorized Login Attempt events trigger an alert. This
option is enabled by default.
General Log
Deny Policies Select this option if you do not want to
include log events from Deny rules on the Firewall > Access
Rule screen. Log events from Deny rules will be logged
separately from Deny Policies if the option, log packets
match this rule, is selected.
Allow Policies Select this option if you want to include
log events from Allow rules on the Firewall > Access Rule
screen. Log events from Allow rules will be logged whether
or not the option, log packets match this rule, is selected.
Authorized Login If this option is enabled, Authorized
Login events are included. This option is enabled by
default.
View System Log To view logs, click this option. The
System Log screen appears.
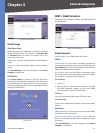
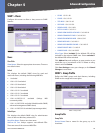
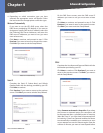
System Log
Current Time The time of the Router is displayed.
Select the log you wish to view: ALL, System Log, Firewall
Log, IPSec Log, or SSL Log. The All log displays a log of
all activities. The System Log displays a list of cold and
warm starts, web login successes and failures, and packet
filtering policies. The Firewall Log displays all activities
regarding the Router’s firewall. The IPSec Log shows
information about IPSec VPN tunnel activity. The SSL Log
shows information about SSL VPN tunnel activity.
Select the severity level of log events you wish to view.
Time The time of each log event is displayed. You can sort
each log by time sequence.
Event-Type The type of log event is displayed.
Message The message associated with each log event is
displayed.
To update a log, click Refresh. To clear a log, click Clear. To
exit the System Log screen and return to the Log > System
Log screen, click Close.
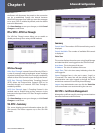
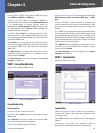
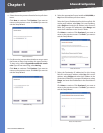
Outgoing Log Table To view the outgoing packet
information including LAN IP, Destination URL/IP and
Service/Port number, click this option.
Outgoing Log Table
To update the on-screen, click Refresh. To exit the
Outgoing Log Table screen and return to the Log > System
Log screen, click Close.
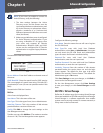
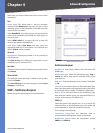
Incoming Log Table To view the incoming packet
information including Source IP and Destination Port
number, click this option.
Incoming Log Table
To update the on-screen, click Refresh. To exit the Incoming
Log Table screen and return to the Log > System Log screen,
click Close.
Clear Log Now To clear your log without e-mailing it,
click this option. Only use this option if you are willing to
lose your log information.
Click Save Settings to save your changes, or click Cancel
Changes to undo them.
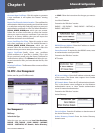
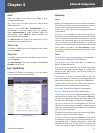
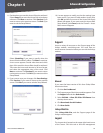
Log > System Statistics
This screen displays statistics about all of the Router’s
ports (LAN and WAN ports). For each port, the following
statistics are listed: Device Name, Status, IP Address, MAC
Address, Subnet Mask, Default Gateway, DNS, number of
Received Packets, number of Sent Packets, number of Total
Packets, number of Received Bytes, number of Sent Bytes,
number of Total Bytes, number of Error Packets Received,
and number of Dropped Packets Received.