


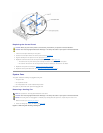


Replacing a Power Supply
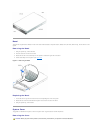
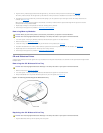
1. With the power-supply handle in the extended position, slide the new power supply into the chassis (see Figure4-10).
2. Rotate the handle down until it snaps into place (see Figure4-10).
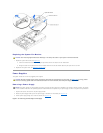
Expansion-Card Cage
The removable expansion-card cage simplifies many installation procedures by allowing you to remove the riser board and all installed expansion cards in a
single step.
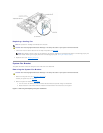
Removing the Expansion-Card Cage
1. Turn off the system, including any attached peripherals, and disconnect the system from the electrical outlet.
2. Remove the cover (see "Removing the Cover").
3. Disconnect all expansion-card cables.
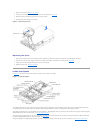
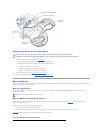
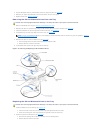
4. Rotate the expansion-card cage lever up until the cage is released from the chassis (see Figure4-11).
5. Lift the cage straight up to clear the chassis (see Figure4-11).
Figure 4-11. Removing and Installing the Expansion-Card Cage
NOTE: After installing a new power supply, allow several seconds for the system to recognize the power supply and determine whether it is working
properly. The power- on indicator will turn green to signify that the power supply is functioning properly (see "Power Indicator Codes").
CAUTION: Before you perform this procedure, read the safety instructions in your System Information document.
CAUTION: See "Protecting Against Electrostatic Discharge" in the safety instructions in your System Information document.