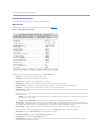
l PCIX Slot Information — Displays a menu that contains information about each of the system's PCI-X slots.
l Console Redirection — Displays a screen that allows you to configure console redirection for use through the serial port. The submenu allows you to
turn the feature on or off, select the remote terminal type, and enable or disable redirection after booting. For more information on using console
redirection, your User's Guide.
l Embedded Remote Access — Displays a menu of three selectable fields: Front-Bezel Chassis Intrusion, Front-Panel LCD Options, and User-Defined
LCD String fields.
¡ Front-Bezel Chassis Intrusion — Selecting this field allows you to enable or disable the chassis-intrusion detection feature.
¡ Front-Panel LCD Options — Selecting this field allows you to select whether you display the service tag, asset tag, or a user-defined string in the
front-panel display.
¡ User-defined String — Selecting this field allows you to enter the user-defined string to be displayed in the front panel. Line 1 is five characters
long, and Line 2 is 16 characters long.
l System Security — Displays a screen that allows you to configure the system password and setup password features. See "Using the System
Password Feature" and "Using the Setup Password Feature" for more information.
l Keyboard NumLock — Determines whether your system starts up with the NumLock mode activated on 101- or 102-key keyboards (does not apply to
84-key keyboards).
l Report Keyboard Errors — Enables or disables reporting of keyboard errors during the POST. This option is useful when applied to self-starting or host
systems that have no permanently attached keyboard. In these situations, selecting Do Not Report suppresses all error messages relating to the
keyboard or keyboard controller during POST. This setting does not affect the operation of the keyboard itself if a keyboard is attached to the system.
l Asset Tag — Displays the customer-programmable asset tag number for the system if an asset tag number has been assigned. To enter an asset tag
numberofupto10charactersintoNVRAM,see"UsingtheDellOpenManageServerAssistantCD"intheUser's Guide.
Boot Sequence Screen
The Boot Sequence screen options determine the order in which the system looks for boot devices that it needs to load during system startup. Available
options include the diskette drive, CD drive, network, and hard drives. You can enable or disable a device by selecting it and pressing the spacebar. To change
the order in which devices are searched, use the <+> and <–> keys.
Hard-Disk Drive Sequence Screen
The Hard-Disk Drive Sequence screen options determine the order in which the system searches the hard drives for the files that it needs to load during
system startup. The choices depend on the particular hard drives installed in your system. To change the order in which devices are searched, use the <+>
and <–> keys. Press <Enter> to confirm your selection.
Integrated Devices Screen
This screen is used to configure the following devices:
l Embedded RAID Controller — Both channels A and B have the same settings. The configurable options will vary, depending on whether the optional
ROMB card is installed.
¡ With optional ROMB card installed — To turn on the RAID functionality of the optional ROMB card, select RAID Enabled. Select Off to turn off RAID
functionality.
¡ Without optional ROMB card installed — To turn on the SCSI controller, select SCSI. To turn off the SCSI controller and mask the presence of the
device, select Off.
l Diskette Controller — Enables or disables the system's diskette drive controller. When Auto (default) is selected, the system turns off the controller
when necessary to accommodate a controller card installed in an expansion slot. You can also set up the drive to be read-only. Using the read-only
setting, the drive cannot be used to write to a disk.
l USB Controller — Enables or disables the system's USB ports. Disabling the USB ports makes system resources available for other devices.
l Embedded 10/100/1000 NIC — Enables or disables the system's two integrated NICs. Options are Enabled without PXE, Enabled with PXE, and
Disabled. PXE support allows the system to boot from the network. Changes take effect after the system reboots.
l MAC Address — Displays the address of the MAC address for the 10/100/1000 NIC that is used by the corresponding integrated NIC. This field has no
user-selectable settings.
l Mouse Controller — Enables or disables the system's mouse controller. Disabling the mouse controller allows an expansion card to use IRQ12.
l Serial Port (1 and 2) — Configures the system's integrated serial ports. The options can be set to Auto (default) to automatically configure the port, to
a particular designation, or to Off to disable the port.
If you set the serial port to Auto and add an expansion card with a port configured to the same designation, the system automatically remaps the
integrated port to the next available port designation that shares the same IRQ setting.
l Speaker — Toggles the integrated speaker On (default) or Off. A change to this option takes effect immediately (rebooting the system is not required).
System Security Screen
You can set the following security features through the System Security screen:
l Password Status — When Setup Password is set to Enabled, this feature allows you to prevent the system password from being changed or disabled
at system start-up.
To lock the system password, you must first assign a setup password in the Setup Password option and then change the Password Status option to
Locked. In this state, the system password cannot be changed through the System Password option and cannot be disabled at system start-up by
pressing <Ctrl><Enter>.
To unlock the system password, you must enter the setup password in the Setup Password option and then change the Password Status option to
Unlocked. In this state, the system password can be disabled at system start-up by pressing <Ctrl><Enter> and then changed through the System
Password option.


