


56 Installing System Components
3
Disconnect all cables from the card.
4
Remove the expansion card:
a
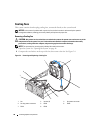
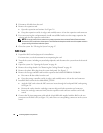
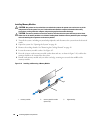
Open the expansion-card retainer. See Figure 3-8.
b
Grasp the expansion card by its edges, and carefully remove it from the expansion-card connector.
5
If you are removing the card permanently, install a metal filler bracket over the empty expansion slot
opening and close the expansion-card retainer.
NOTE: You must install a filler bracket over an empty expansion slot to maintain Federal Communications
Commission (FCC) certification of the system. The brackets also keep dust and dirt out of the system and aid in
proper cooling and airflow inside the system.
6
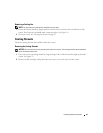
Close the system. See "Closing the System" on page 47.
RAC Card
1
Unpack the RAC card and prepare it for installation.
For instructions, see the documentation accompanying the card.
2
Turn off the system, including any attached peripherals, and disconnect the system from the electrical
outlet.
3
Open the system. See "Opening the System" on page 46.
4
Remove the cooling shrouds. See "Removing the Cooling Shrouds" on page 49.
5
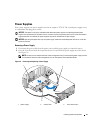
Remove the plastic filler plug from the system back panel. See Figure 1-3.
6
Remove the storage controller card from the expansion slot labeled INTERNAL STORAGE:
a
Disconnect all data cables from the card.
b
Grasp the storage controller card by its edges, and carefully remove it from the card connector.
7
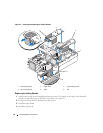
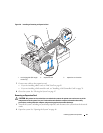
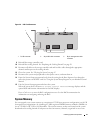
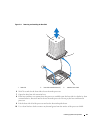
Install the RAC card in the slot labeled RAC_CONN:
a
Angle the RAC card so that the NIC connector inserts through the back-panel RAC card opening.
See
Figure 3-9.
b
Position the card so that the card-edge connector aligns with the expansion-card connector.
c
Insert the card-edge connector firmly into the expansion-card connector until the card is fully
seated.
8
Connect the 50-pin management cable and the 44-pin MII cable supplied with the RAC to the two
connectors on the RAC card (see Figure 3-9), and to the two corresponding connectors on the system
board.