94 Installing System Components
NOTE: Ensure that the SAS backplane power cable from the power distribution board does not impede the
system board as you lower the system board into the chassis.
c
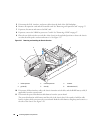
Slightly lift up the front of the system board and maneuver the system board to the bottom of the
chassis until it lays completely flat.
d
Ensure that all retention hooks on the bottom of the chassis are inserted into the retention slots on
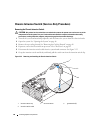
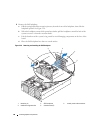
the system board. See Figure 3-30.
e
Push the system board toward the back of the chassis until the blue retention pin snaps into place.
4
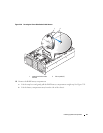
Install the RAID battery compartment:
a
Insert the two securing tabs on the battery compartment into the two securing slots on the side of
the chassis. See Figure 3-29.
b
Press down the battery compartment to secure it.
5
Connect the cables in the order listed below (see Figure 6-2 and Figure 6-3 for the locations of the
connectors on the system board and on the SAS backplane):
• Power distribution harness to the power connectors on the corner of the system board
• Interface cable from the system board CONTROL_PANEL connector to the SAS backplane
interface connector
• SAS A data cable from controller card connector 0 connector to the SAS A backplane connector
• SAS B data cable from controller card connector 1 to the SAS B backplane connector, if applicable
• SAS power cable to the SAS backplane power connector
• Chassis intrusion switch cable to the system board intrusion switch connector
6
Install the processor heat sinks. See "Processors" on page 62.
7
If applicable, reinstall the two processor VRMs. See "Installing a VRM" on page 66.
8
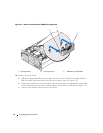
Install the chassis crossbar:
a
Insert the guides on each end of the crossbar into the slots on each side of the chassis. See
Figure 3-27.
b
Slide the crossbar down until the guides are at the bottom of the slots.
c
Secure the crossbar by sliding the two slide switches on each side of the chassis to the locked
position.
9
Install all expansion cards. See "Installing an Expansion Card" on page 53.
10
If applicable, reconnect the RAID battery cable to the RAID controller card.
11
If applicable, reinstall and connect the RAC card.
12
Install the cooling shrouds. See "Replacing the Cooling Shrouds" on page 50.
13
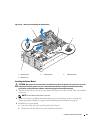
Install the optical drive/diskette drive carrier.
Slide the drive carrier into its drive bay and press in the release latch. See
Figure 3-14
.


