


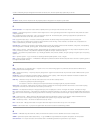


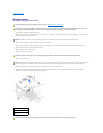

14. Attach the drive cable to the connector on the new drive, being careful not to bend any of the pins.
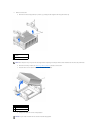
15. Slide the drive into the drive bay and lower the hard-drive door to lock into place.
16. Replace the cable cover (if used).
17. Attach the computer to the mounting plate (if used).
18. Connect your computer to the power adapter and devices to their electrical outlets, and turn them on.
See the documentation that came with the drive for instructions on installing any software required for drive operation.
19. Reboot the computer.
20. Partition and logically format your drive before you proceed to the next step.
For instructions, see the documentation that came with your operating system.
21. Test the hard drive by running the Dell Diagnostics.
22. Install your operating system on the hard drive.
For instructions, see the documentation that came with your operating system.
After you replace the cover, the chassis intrusion detector, if enabled, causes the following message to appear on the screen at the next computer start-
up:
ALERT! Cover was previously removed.
23. Reset the chassis intrusion detector by changing Chassis Intrusion to Enabled or Enabled-Silent.
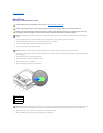
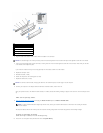
NOTICE: There are four extra pins on the hard drive that are not on the cable connector. Use care when attaching the cable so that the drive pins are
not bent or broken.
1
drive cable
2
drive connector
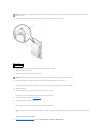
NOTICE: To connect a network cable, first plug the cable into the network wall jack, and then plug it into the computer.