Data Collection Module
102
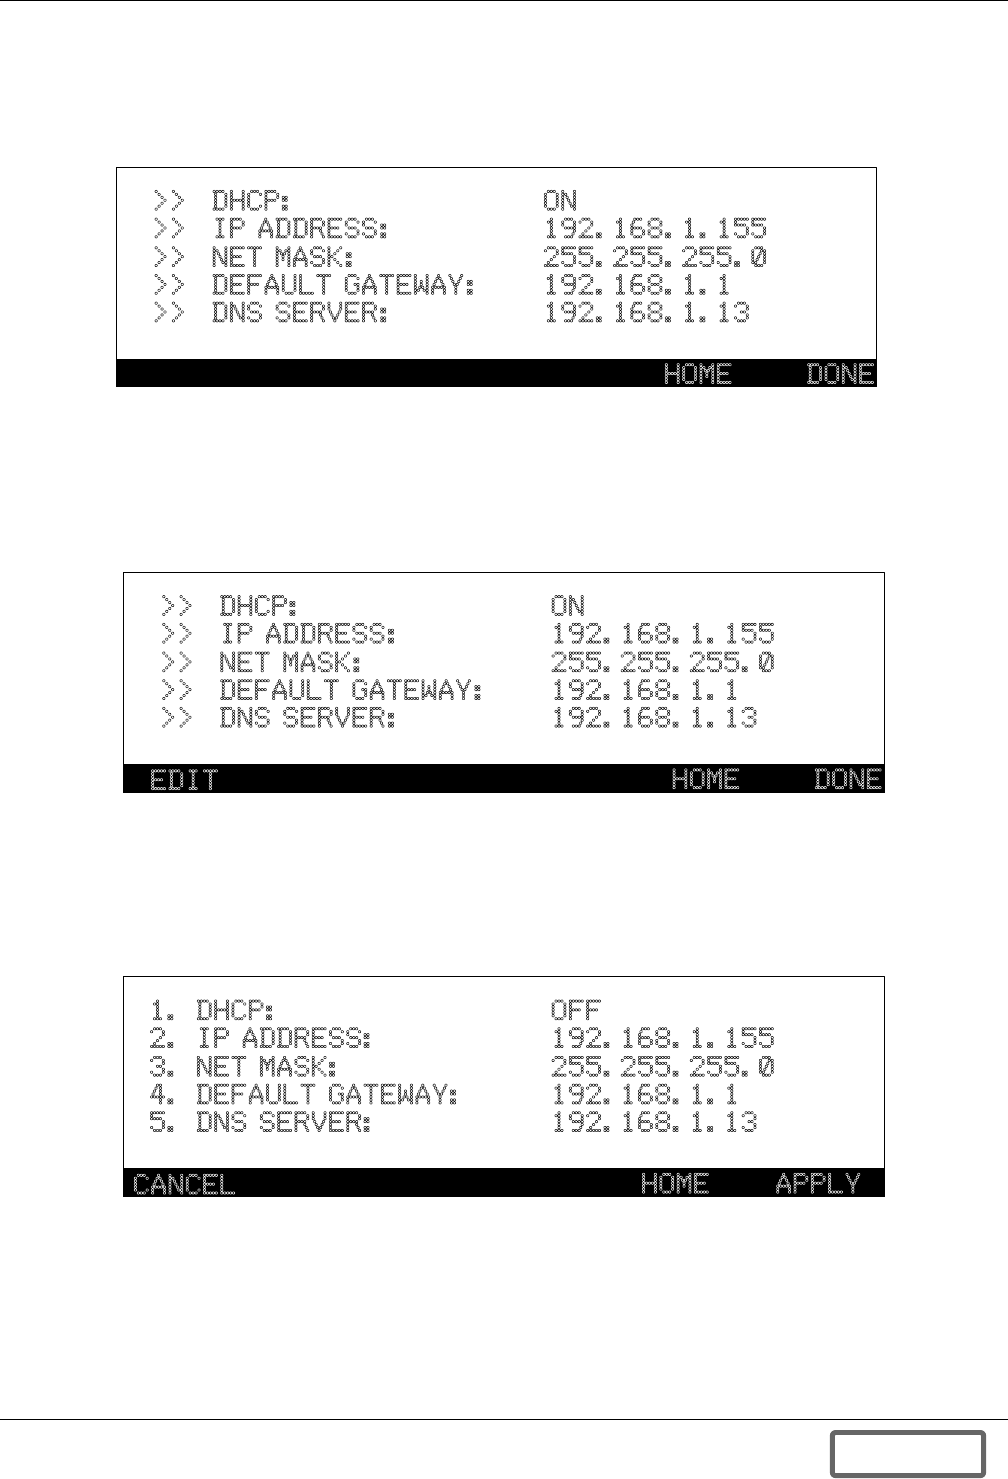
To view the Network settings return to the View menu and press number 6 “Network”. The Network
view screen displays the network addresses coming from the DCM. Static address settings can be
entered using the keypad into this screen. The Network screen will show the assigned IP Address,
Default Gateway, Subnet Mask and DNS Server.
Figure 108 Networks view
By entering a Password to access the User or Service level mode you can edit this function. Pressing
the EDIT button, F1, will place the system in the edit mode. The DHCP must be disabled or turned
Off to proceed with setting IP addresses and other settings. After pressing EDIT you will see up/down
arrows next to the DHCP On value. Pressing the up or down arrows on the keypad will allow you to
turn this function Off or On.
Figure 109 Networks view, turn off DHCP
Once you have turned DHCP OFF, press EDIT again and now you will see numbers next to each of
the settings. Pressing the corresponding number will allow you to enter or change that value. At any
time you may press CANCEL to cancel the changes, once changes or entries are complete, press
APPLY to complete entry process. Pressing APPLY will reboot system and in a few minutes the sys-
tem will display the new screen.
Figure 110 Networks view, edit settings (service level)
HOME DONE
>>
>>
>>
>>
>>
DHCP:
IP ADDRESS:
NET MASK:
DEFAULT GATEWAY:
DNS SERVER:
ON
192.168.1.155
255.255.255.0
192.168.1.1
192.168.1.13
HOME DONE
>>
>>
>>
>>
>>
DHCP:
IP ADDRESS:
NET MASK:
DEFAULT GATEWAY:
DNS SERVER:
ON
192.168.1.155
255.255.255.0
192.168.1.1
192.168.1.13
EDIT
HOME APPLY
1. DHCP:
2. IP ADDRESS:
3. NET MASK:
4. DEFAULT GATEWAY:
5. DNS SERVER:
OFF
192.168.1.155
255.255.255.0
192.168.1.1
192.168.1.13
CANCEL
DISCONTINUED
PRODUCT
