


72
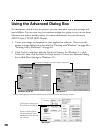
7. Select a color management system (the availability depends on your operating
system):
■ Color Adjustment mode lets you choose just the level of adjustment you need,
from Automatic mode to No Color Adjustment (for using other color
management software). You can then individually adjust the levels of
Brightness, Contrast, and Saturation in your image, and increase or decrease
the amount of Cyan, Magenta, and Yellow inks used to print your image.
■
PhotoEnhance3 (Windows 95, 98, NT, or Macintosh) or PhotoEnhance
(Windows 3.1): For printing images captured using a video camera, scanner,
or digital camera. Use the example photograph on the screen to help you
adjust the Tone of your photo or correct common digital image flaws using
Digital Camera Correction mode and the Sharpness button.
■
ICM (Image Color Matching; Windows 95 and Windows 98 only)
For printing documents created in an ICM compatible application.
■ sRGB (Standard Red Green Blue; not available with Windows 3.1;
recommended only with Windows 98): For printing documents created in an
sRGB compatible application using sRGB colors, such as those designed for
the World Wide Web. See your Windows 98 online help for details.
■ ColorSync (Macintosh only): Automatically adjusts printout colors to closely
match the colors on your screen.
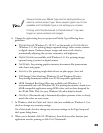
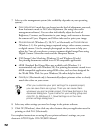
After you customize your print settings for a special project,
you can save them as a group. Then you can reuse them
whenever you print a similar project. Click Save Settings in the
Advanced dialog box. Type a name for your setting group and
click OK. (In Windows 3.1, Save Settings is on the main
printer settings dialog box.)
8. Select any other settings you need to change in the printer software.
9. Click
OK (Windows), then click any other buttons that your application uses for
printing or click
Print (Macintosh).
For complete instructions on using all your printer software’s settings, see your
electronic EPSON Stylus COLOR 900N Manual.
basicprn.fm Page 72 Friday, February 19, 1999 4:01 PM