


SW2 DP • Installation 8
Enabling Auto-input Switching
You can set up the SW2 DP to automatically select the active connected input based on
the active Main Link signal. If both inputs are active, input 1 is selected. When auto-input
switching is in effect, the green Auto Switch LED on the front panel lights and the front
panel input selection buttons are disabled.
To enable auto-input switching:
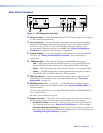
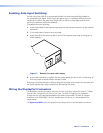
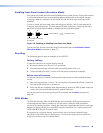
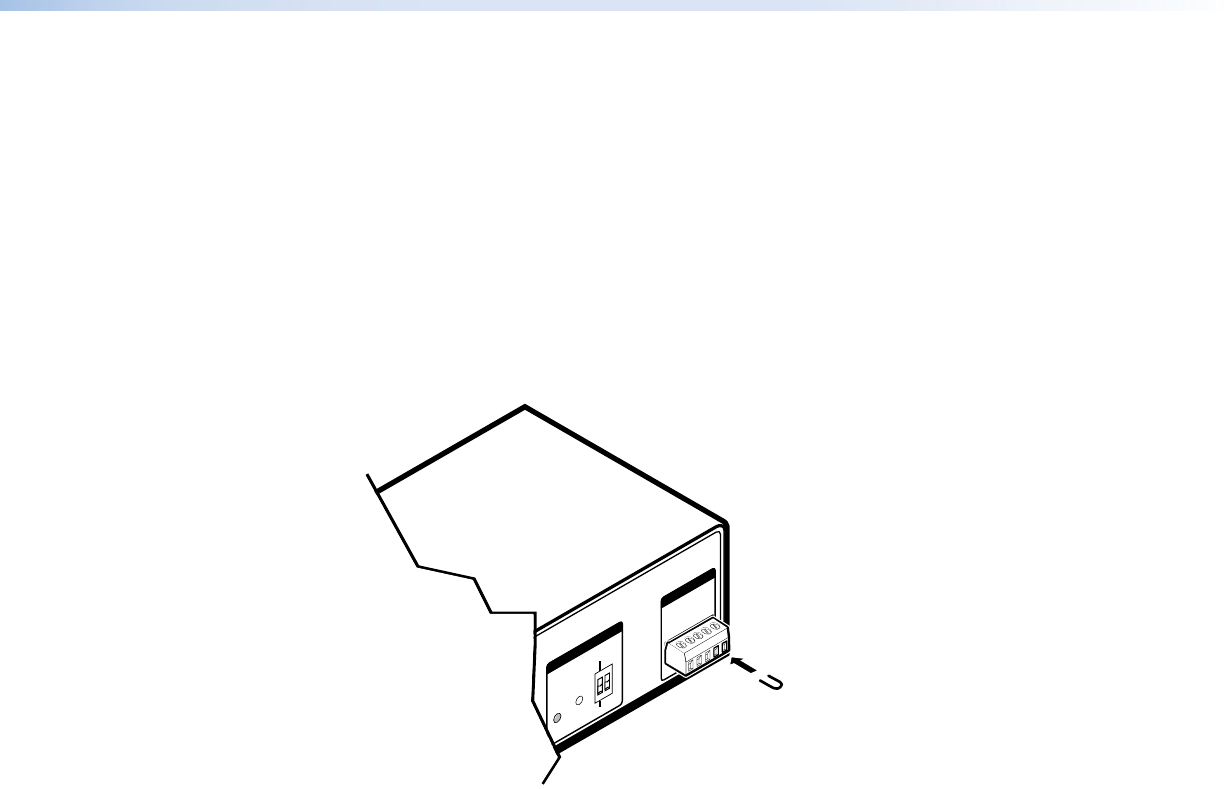
1. Insert the provided 5-pole captive screw plug into the Remote connector on the switcher
rear panel.
2. Cut a small piece of wire to use as a jumper.
3. Insert the ends of the wire into slots 4 and 5 of the captive screw plug, shorting pins 4
and 5 together.
12V
- - A MAX
POWER
EDID
STORE
DEFAULT
21
STORED
RS-232 AUTO
RX GTX
INPUTS
OUTPUT
EDID
REMOTE
SW2 DP RS
Figure 7. Remote Connector with Jumper
4. Use a small screwdriver to tighten the two screws above pin slots 4 and 5 of the plug, so
that the jumper wire ends remain securely in place.
Auto-input switching remains in effect as long as the jumper wire connects the two pins and
the 5-pole captive screw plug is attached to the Remote connector.
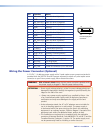
Wiring the DisplayPort Connectors
The DisplayPort connectors support data rates of either 1.62 Gbps (reduced bit rate) or 2.7 Gbps
(high bit rate), using either one, two, or four lanes. The SW2 DP supports mini DisplayPort
through the use of the appropriate adapters and cables (not provided).The SW2 DP supports
resolutions up to 2560x1600. If audio is available from the sources, it is also available to the
output device.
The
figure and table on the next page show pin assignments for the DisplayPort connectors.