


Removal and Installation
8-12
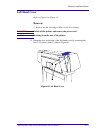
HP DesignJets 1050C and 1055CM Printers Service Manual
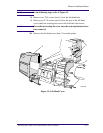
Paper-axis Motor Assembly
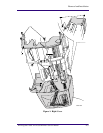
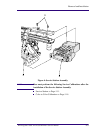
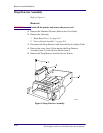
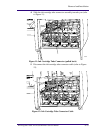
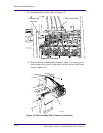
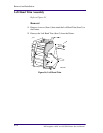
Refer to Figure 7.
Removal
WARNING Switch off the printer and remove the power cord.
1. Remove the following:
1. "Right Hand Cover" see page 8-4.
2. "Service Station Assembly" see page 8-8.
2. Disconnect the Paper-axis Motor cable from position P3 PAPER
MOTOR on the electronics module.
3. Disconnect the Paper-axis encoder cable from position P1 PAPER
ENCODER on the electronics module.
4. Remove the two T-10 screws (item 1) securing the gear (item 2) to
the right side of the roller and remove the gear.
5. Remove the four T-20 screws (item 3) securing the Paper-axis
Motor Assembly (item 4) to the right hand chassis. Remove the
Paper-axis Motor Assembly.
Figure 7: Paper-axis Motor Assembly
NOTE You must perform the Accuracy Calibration (⇒ Page 5-6) after
the installation of the Paper-Axis Motor Assembly.
C607421
1
2
4
3
3