


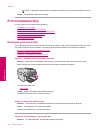


Photos in a connected digital camera with PictBridge do not print
Try the following solutions to resolve the issue. Solutions are listed in order, with the most likely solution first. If the
first solution does not solve the problem, continue trying the remaining solutions until the issue is resolved.
•
Solution 1: Set the camera to PictBridge mode
•
Solution 2: Save the photos in a supported file format
•
Solution 3: Select photos on the camera for printing
Solution 1: Set the camera to PictBridge mode
Solution: If the camera supports PictBridge, make sure the camera is set to PictBridge mode. See the user
guide that came with the camera for instructions on how to do this.
Cause: The digital camera was not in PictBridge mode.
If this did not solve the issue, try the next solution.
Solution 2: Save the photos in a supported file format
Solution: Make sure the digital camera is saving photos in a file format that the PictBridge transfer feature
supports (Exif/JPEG, JPEG, and DPOF).
Cause: The images were not in a supported format.
If this did not solve the issue, try the next solution.
Solution 3: Select photos on the camera for printing
Solution: Before you connect the digital camera to the front USB port on the product, select some photos on
the camera for printing.
NOTE: Some digital cameras do not allow you to select photos until after you have established a PictBridge
connection. If this is the case, connect your digital camera to the front USB port, turn on the camera and
change it to PictBridge mode, and then use the camera to select the photos you want to print.
Cause: You did not select any photos on the camera for printing.
Scan troubleshooting
Use this section to solve these scan problems:
•
Scanned image is blank
•
Scanned image is incorrectly cropped
•
Scanned image has incorrect page layout
•
Scanned image shows dotted lines instead of text
•
Text format is incorrect
•
Text is incorrect or missing
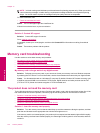
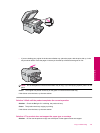
Scanned image is blank
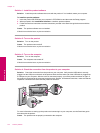
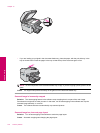
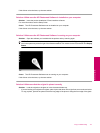
Solution: Load the original on the glass or in the document feeder tray.
• If you are loading your original on the glass, place it print side down on the right front corner as shown below.
To copy a photo, position the photo so that the long edge of the photo is along the front edge of the glass.
Scan troubleshooting 135
Solve a problem