


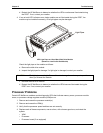


Chapter 6 Replacing Parts
81
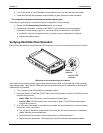
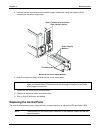
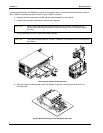
To replace the control panel:
1. Back up the hard disk drive(s) and save the configuration.
2. If necessary, shutdown the network operating system.
3. Turn off the HP NetServer and display.
4. Disconnect all telephone cables and power cords.
5. Remove the right side cover (pedestal version) or the bottom cover (rack-mounted version).
6. Unhook the control panel cable from the I/O board.
7. Remove the two screws securing the control panel to the chassis.
8. Remove the control panel from the HP NetServer by guiding the cable out through the hole in
the chassis sheet metal.
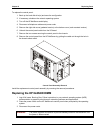
Control Panel Assembly Removal
Install the replacement control panel assembly by reversing the removal procedures.
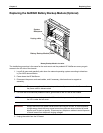
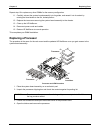
Replacing the HP NetRAID DIMM
1. Log off all users. Back up files. Follow instructions in your network operating system (NOS)
documentation to gracefully shut down all networking software and applications.
2. Press the power switch on the HP NetServer's control panel when prompted by the operating
system.
3. Disconnect the power cords.
WARNING The power supplies will continue to provide standby current to the NetServer until
the power is disconnected.