


Chapter 6 Replacing Parts
82
4. If you have a rack-mounted LH 6000r, then consider removing the cables from the rear of the
enclosure before extending the enclosure on the slides (if you don't have a cable management
arm). If necessary, label the cables to support re-connecting them.
5. Remove the top cover (rack-mount orientation) or the left side cover (pedestal version).
CAUTION Wear a wrist strap and use a static-dissipating work surface connected to the
chassis when handling components. Ensure that the metal of the wrist strap
contacts your skin.
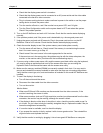
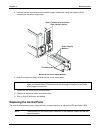
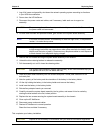
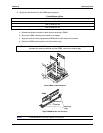
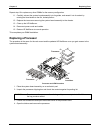
6. Locate and remove the DIMM from the I/O board.
HP NetRAID
DIMM
I/O Board
NOTE: The I/O board
does NOT have to be
removed to swap out
the DIMM.
Remove the HP NetRAID DIMM from the I/O Board
7. Replace the DIMM and reassemble the system.
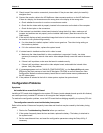
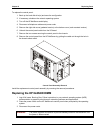
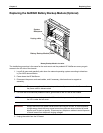
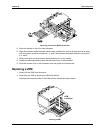
Replacing the System Battery
1A
1B
2A
2B
3A
3B
4A
4B
DIMM
Slots
Battery
System Board – Battery Location
The installation procedure is the same for the rack-mount and the pedestal HP NetServers once you gain
access to the system board assembly.