


2-16 Removal and Replacement HP OmniBook 2100/3000/3100
Reassembly Notes
Caution
Be sure to replace the LCD module or other display components with compatible parts.
Components may be damaged if compatible parts are not used. See the table above.
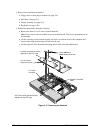
• Secure the LCD flex cable to the LCD module with a piece of Kapton tape next to the LCD
connector.
• Before installing the LCD module, make sure the EPE foam is properly positioned inside the
display bracket. For the OmniBook 3000, if two flaps are present, they should be on top of the
center bar of the bracket.
• Position the cables properly in the hinges before installing the bezel.
• Make sure the bezel snaps to the case along all edges. Pull to the side to help seat the snaps.
• Make sure the screw covers stick securely in place.
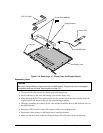
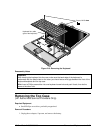
Removing a 12" Display Case or Display Bracket
(HP Authorized Service Providers Only)
Required Equipment
• Small Phillips screwdriver, preferably magnetized.
• Pointed knife or probe.
Removal Procedure
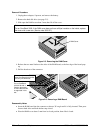
1. Unplug the ac adapter, if present, and remove the battery.
2. Remove these additional assemblies:
• Floppy drive or other plug-in module (see page 2-4).
• Display assembly (see page 2-9).
• LCD module (see page 2-12).
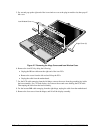
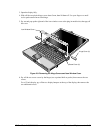
3. Remove the LCD flex cable. It may be held by tape.
4. Remove the six screws holding the hinges and display bracket.
5. Lift the front edge of the bracket slightly and slide it toward the rear, then lift it out of the case.
6. Lift out the hinges.
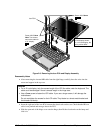
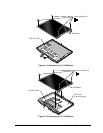
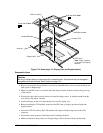
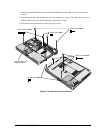
7. To replace the display case, remove the inverter PCA from the case with the inverter/MB cable.
You may have to remove a piece of Kapton tape to do this.