HP OmniBook 2100/3000/3100 Removal and Replacement 2-19
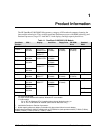
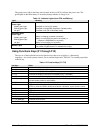
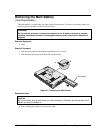
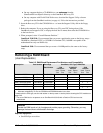
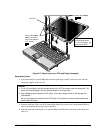
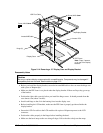
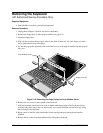
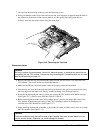
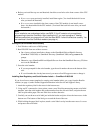
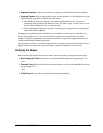
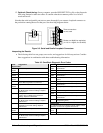
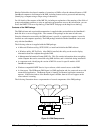
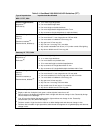
Figure 2-14. Removing a 13" Display Case and Display Bracket
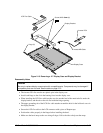
Reassembly Notes
Caution
Be sure to replace display components with compatible parts. Components may be damaged if
compatible parts are not used. See the table on page 2-12.
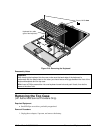
• Before you install the display bracket, secure the inverter/MB cable to the case near the hinge area
with a piece of Kapton tape.
• Make sure the EPE foam is not placed under the display bracket. If there are flaps, they go on top
of the bracket.
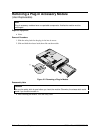
• Position the right cable correctly before you install the hinge screws. It should protrude from the
case almost 6 cm (about 2 inches).
• Install each hinge so the slit in the housing faces into the display case.
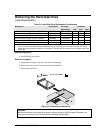
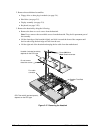
• Before installing the LCD module, make sure the EPE foam is properly positioned inside the
display bracket.
• Secure the LCD flex cable to the LCD module with a piece of Kapton tape next to the LCD
connector.
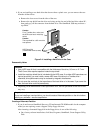
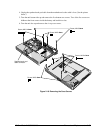
• Position the cables properly in the hinges before installing the bezel.
• Make sure the bezel snaps to the case along all edges. Pull to the side to help seat the snaps.
Screw, M2.5×3mm
Screw, M2.5×5mm
LCD Flex Cable
Display Bracket
Inverter PCA
Display Case
Hinge (2)
Inverter/MB Cable
EPE Foam
Note: Flaps, if present,
go on top of the display
bracket.