HP OmniBook 2100/3000/3100 Removal and Replacement 2-29
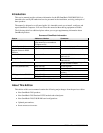
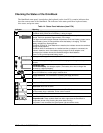
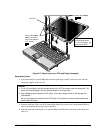
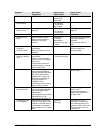
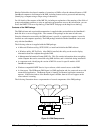
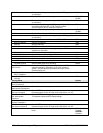
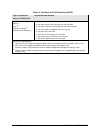
Installing New Regulatory and Serial-Number Labels — OmniBook 3000
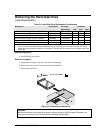
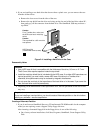
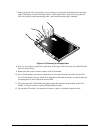
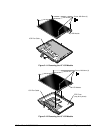
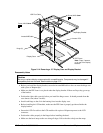
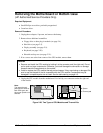
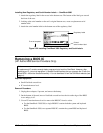
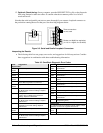
1. Attach the regulatory label in the recess in the bottom case. The bottom of the label goes toward
the front of the case.
2. Looking at the serial number on the unit’s original bottom case, create a replacement serial
number label.
3. Attach the serial number label to the bottom area of the regulatory label.
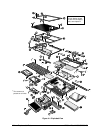
Figure 2-22. Installing OmniBook 3000 Regulatory and Serial Labels
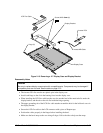
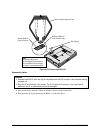
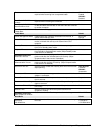
Removing a BIOS IC
(HP Authorized Service Providers Only)
Note
A replacement IC contains enough basic programming to boot the OmniBook. However, after
replacing an IC, you must reprogram it. Hewlett-Packard prefers that you program the IC with the
latest BIOS—follow the directions carefully. You can download it from the OmniBook website (see
page vi).
Required Equipment
• Small flat-blade screwdriver.
• IC insertion/removal tool.
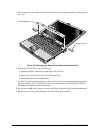
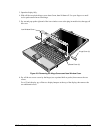
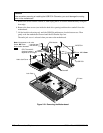
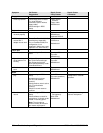
Removal Procedure
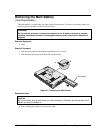
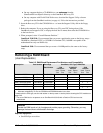
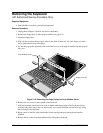
1. Unplug the ac adapter, if present, and remove the battery.
2. On the bottom of the unit, insert a flat-blade screwdriver into the slot at the edge of the BIOS
cover and pry it off.
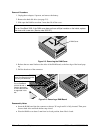
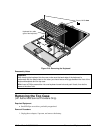
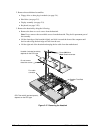
3. Use an IC insertion/removal tool to remove the BIOS IC from its socket.
• For the OmniBook 2100/3100, a single BIOS IC contains both the system and keyboard
BIOS.
• For the OmniBook 3000, two separate BIOS ICs contain the system BIOS and keyboard
BIOS.
Regulatory Label
Printed
serial number label
Front of computer