


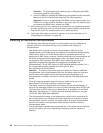


v
Install
only
2.5
V,
184-pin,
double-data-rate
(DDR),
PC2100,
registered
synchronous
dynamic
random-access
memory
(SDRAM)
with
error
correcting
code
(ECC)
DIMMs.
These
DIMMs
must
be
compatible
with
the
latest
PC2100
SDRAM
Registered
DIMM
specification,
which
is
available
from
http://www.jedec.org/.
v
Before
you
begin,
read
the
documentation
that
comes
with
the
DIMMs.
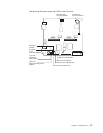
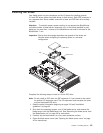
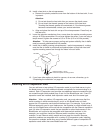
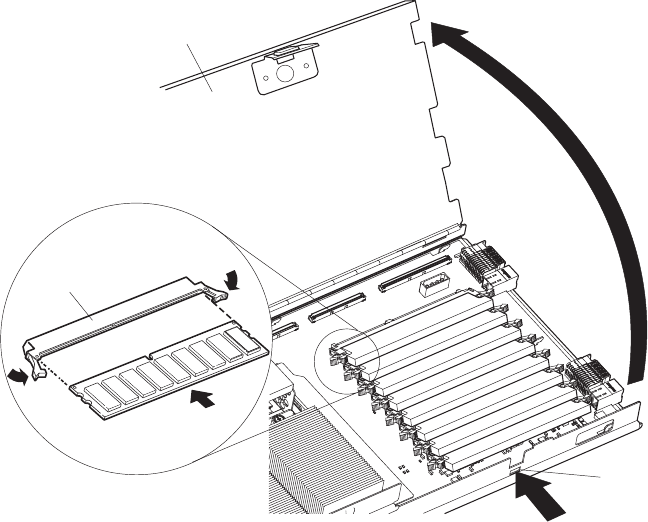
The
following
illustration
shows
how
to
install
DIMMs
on
the
processor
board.
DIMM 1
DIMM 2
DIMM 3
DIMM 4
DIMM 5
DIMM 6
DIMM 7
DIMM 8
I/O-board tray
I/O tray release
DIMM socket
Complete
the
following
steps
to
install
a
DIMM:
1.
Review
the
safety
information
beginning
on
page
109
and
“Installation
guidelines”
on
page
33.
2.
Shut
down
the
operating
system,
turn
off
the
blade
server,
and
remove
the
blade
server
from
the
BladeCenter
unit.
See
“Removing
the
blade
server
from
the
BladeCenter
unit”
on
page
39
for
instructions.
3.
Carefully
lay
the
blade
server
on
a
flat,
nonconductive
surface.
4.
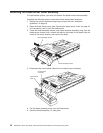
Open
the
blade
server
cover
(see
“Opening
the
blade
server
cover”
on
page
40
for
instructions)
and
lift
it
off
the
blade
server.
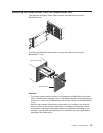
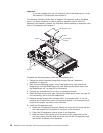
5.
Press
the
I/O-tray
release
and
rotate
the
I/O-tray
open,
as
shown
in
the
illustration.
The
I/O
tray
is
hinged
and
will
support
itself
in
the
open
position.
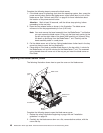
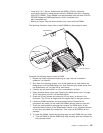
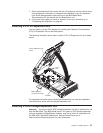
6.
Locate
the
DIMM
connectors
on
the
processor
board.
Determine
the
connectors
into
which
you
will
install
the
DIMMs
(see
the
table
on
page
44.).
7.
Touch
the
static-protective
package
that
contains
the
DIMM
option
to
any
unpainted
metal
surface
on
the
BladeCenter
chassis
or
any
unpainted
surface
on
any
other
grounded
rack
component.
Then,
remove
the
DIMM
from
the
package.
8.
To
install
the
DIMMs,
repeat
the
following
steps
for
each
DIMM
that
you
install:
a.
Turn
the
DIMM
so
that
the
DIMM
keys
align
correctly
with
the
connector
on
the
processor
board.
Chapter
4.
Installing
options
45