Intel NetStructure
®
MPCBL0010 Single Board Computer
October 2006 Technical Product Specification
Order Number: 304120 29
Operating the Unit—MPCBL0010 SBC
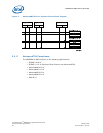
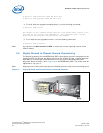
3. Insert two matched pair DIMMs.
Warning: Using excessive force to install memory can damage the DIMM socket and/or circuit
board.
4. Reinstall the cover.
5. Reinstall the six cover screws.
Note: Should any of the cover screws get lost in this process, the specifcations for them are:
• Flat head Phillips screws countersunk M2.5 x 3.4
• Steel with Precote* 80 (pink) coating all around
3.4 Installing and Extracting the SBC
The ability to replace SBCs without affecting the operation of the chassis is a major
element of the PICMG AdvancedTCA standard. This Hot Swap functionality requires a
faceplate ejector handle designed to the PICMG specifications. The new handle has two
important functions:
• Activate the Hot Swap microswitch on the chassis. The handle does this by
sliding inward at the start of the extraction procedure.
• Operate within a narrow range of motion. The handle is designed to provide
clearance from other chassis components (cables, cable trays, PEMs, etc.) that
would otherwise interfere with handle movement in some installations. It also
allows clearance for AdvancedMCs to be installed or removed while the SBC is
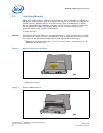
operating in the chassis. This is accomplished through a ratcheting mechanism
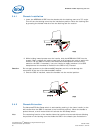
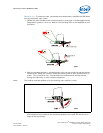
where the handle is connected to the latching cam (See the illustration in
Section 3.4.1, “Chassis Installation”).
Please review the procedures below before attempting to install or remove the
MPCBL0010 SBC from an AdvancedTCA chassis.
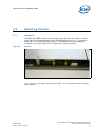
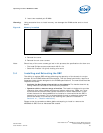
Figure 8. Memory Installed


