


Removing and Installing Baseboard Components 67
Removing a VRM
CAUTIONS
VRM must be appropriate: You might damage the system if you install
a VRM that is inappropriate for your system. For exact information about
VRM and processor interchangeability, contact your customer service
representative.
ESD and handling processors: Reduce the risk of electrostatic
discharge (ESD) damage to the VRM by doing the following: (1) Touch the
metal chassis before touching the VRM or baseboard. Keep part of your
body in contact with the metal chassis to dissipate the static charge while
handling the VRM. (2) Avoid moving around unnecessarily.
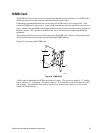
To decide what VRM you need to remove, see Figure 1 on page 14.
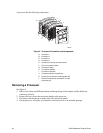
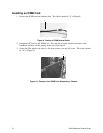
1. Using a small flat-bladed screwdriver, push the plastic ejector levers on each end of the
connector away from the VRM to eject it out of the connector.
2. Pull VRM straight up and out of the baseboard.
3. Place the VRM on a nonconductive, static-free surface, or store it in an antistatic protective
wrapper.
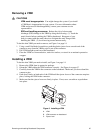
Installing a VRM
To decide what VRM you need to install, see Figure 1 on page 14.
1. Remove the VRM from its protective package.
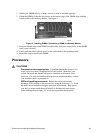
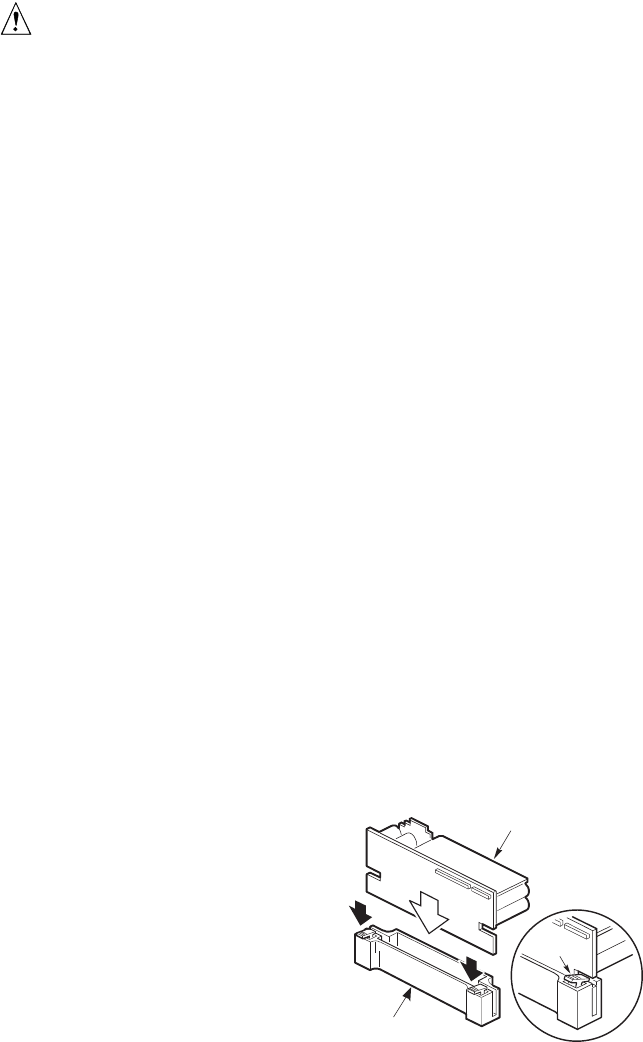
2. Orient the VRM within the VRM connector correctly. See Figure 6 on page 67.
3. Carefully insert the VRM in the connector on the baseboard. Make sure you do not bend the
connector pins.
4. Push down firmly on both ends of the VRM until the ejector levers of the connector snap into
place, locking the VRM in the connector.
5. Make sure that the ejector levers are firmly in place. If not, use a screwdriver to push them
into place.
OM09922
B
A
C
Figure 6. Installing a VRM
A. VRM
B. VRM connector on baseboard
C. Ejector lever