


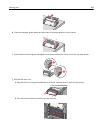
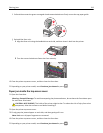
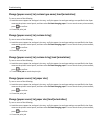

i Pull and then rotate the green rectangular knob counterclockwise to firmly secure the top paper guide.
1
2
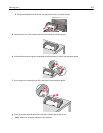
j Reinstall the fuser unit:
1 Align the fuser unit using the handholds on each side, and then insert it back into the printer.
2 Turn the screws clockwise to fasten the fuser securely.
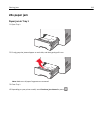
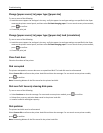
4 Close the printer top access cover, and then close the front door.
5 Depending on your printer model, touch Continue, jam cleared or press .
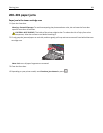
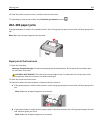
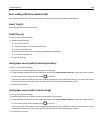
Paper jam inside the top access cover
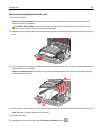
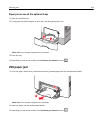
1 Open the front door.
Warning—Potential Damage: To avoid overexposing the photoconductors, do not leave the front doors open
for more than 10 minutes.
CAUTION—HOT SURFACE: The inside of the printer might be hot. To reduce the risk of injury from a hot
component, allow the surface to cool before touching it.
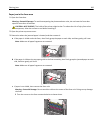
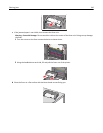
2 Open the printer top access cover.
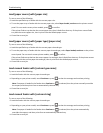
3 Firmly grasp the jammed paper on each side, and then gently pull it out.
Note: Make sure all paper fragments are removed.
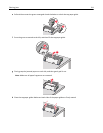
4 Close the printer top access cover, and then close the front door.
5 Depending on your printer model, touch Continue, jam cleared or press .
Clearing jams 212